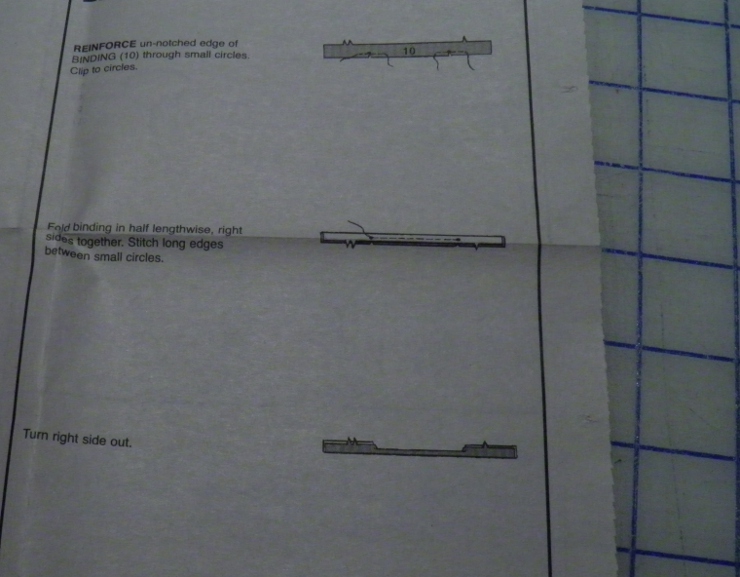
Pattern instructions from McCalls 6225 childrens sleepwear pattern
I hope you can read these %$*#) worthless pattern instructions. Worse than worthless. And that kind of nonsense from the McCalls pattern company makes me hopping mad. Pure, unadulterated laziness.
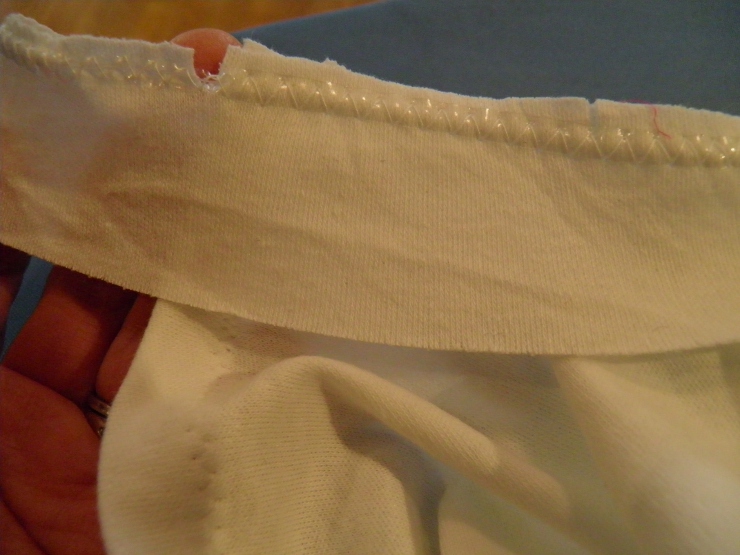
“Turn right side out.” Sounds simple enough, doesn’t it? I am hardly new to working with knits, and thirty minutes later all I had was a hole in the middle of the binding strap that was stuck part way thru the “turn right side out” step. Lots of bad words spewed cuz I was in a hurry, as usual, trying to get samples made up for a camp fair I am exhibiting in on Saturday. OK, throw these %$*#) worthless pattern instructions away and see what I did instead.
1. Cut out your binding strips using the pattern piece. That much is OK.
2. Stitch short ends together using seam allowance on your pattern (mine was 3/8″).
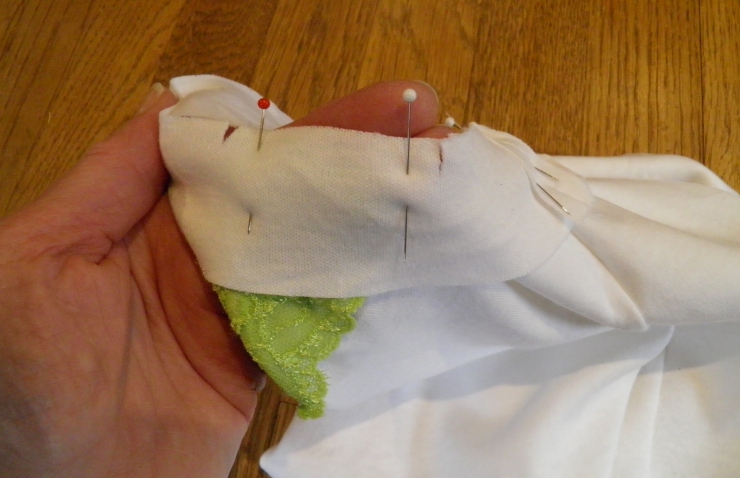
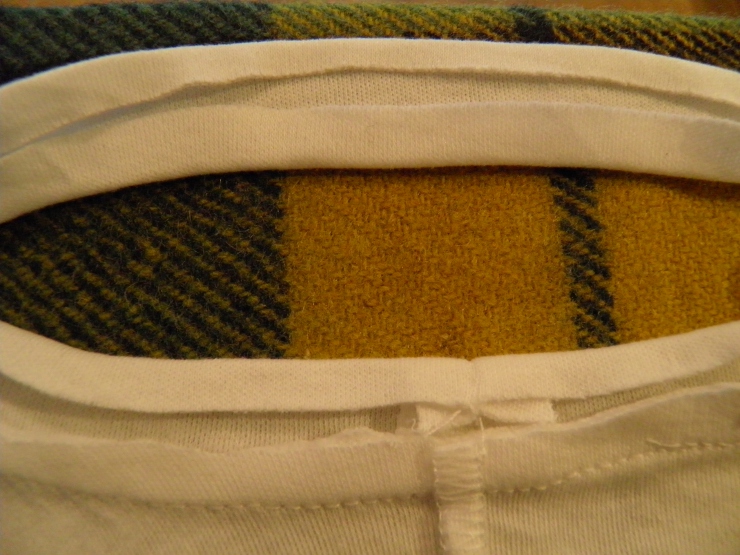
3. Pin the binding to the armhole of your cami, matching the binding seam to the armhole seam and the binding notches to the armhole notches. I notched the binding where it was supposed to meet the hem edge of the cami front and back. Instead of drawing a stupid little dot on the fabric I snipped. Faster and easier!
4. Stitch the binding to the armhole only, backstitching at both ends. Use the seam allowance indicated (again, 3/8″ on my pattern). Good Lord, I could use a manicure!
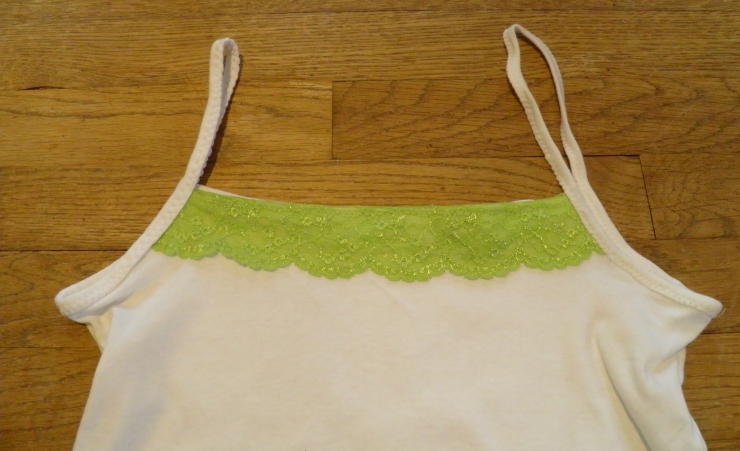
5. Press the seam allowance around the armhole toward the binding and press both edges of the shoulder strap area toward the center.
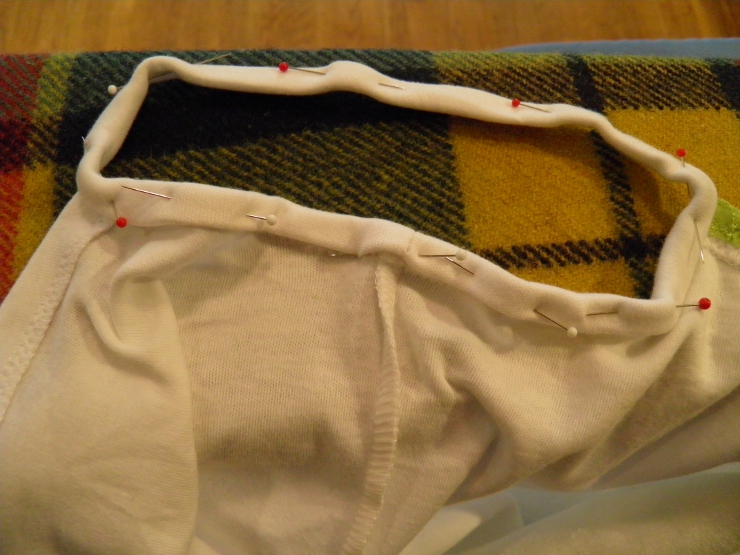
6.Fold and pin the unstitched edge of the binding to meet the stitching line on the underarm area, and on the shoulder strap make the 2 pressed folds meet.
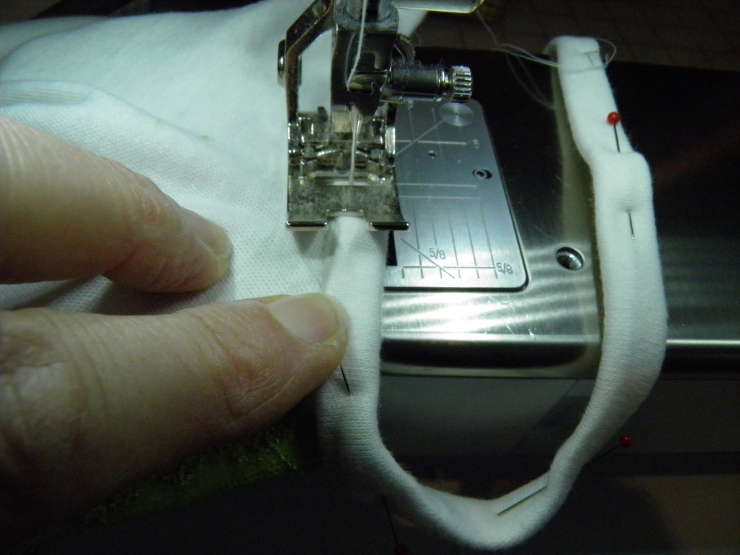
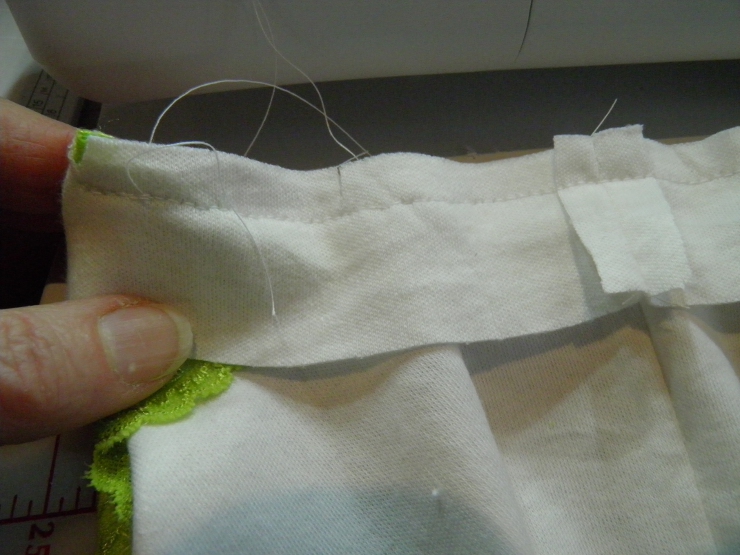
7. Starting at the underarm area, using a zig-zag stitch, stitch around the entire binding.
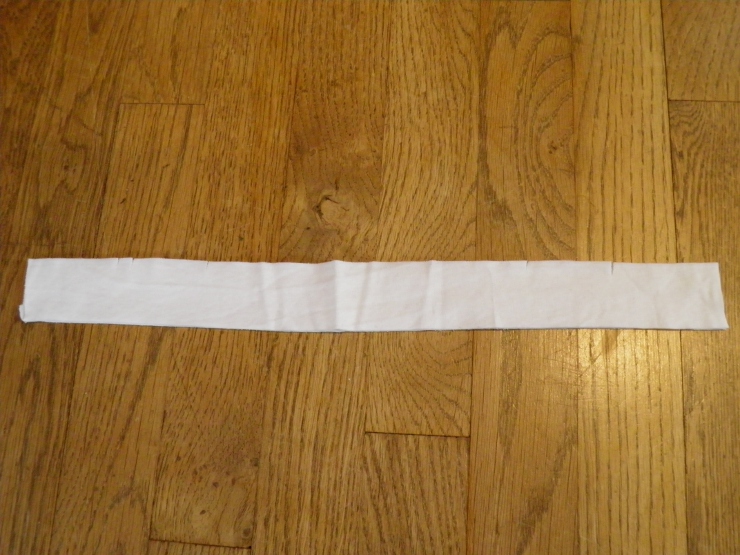
Holy crap. Look how much the stitched binding stretched out compared to the original binding. On the second strap I tried technique # 2. Follow steps 1-3 as above, but then:
4 revised. Starting at the underarm, apply 1/4″ clear elastic with a zig-zag stitch around the ENTIRE binding. Yes, even around the shoulder strap section that you did NOT stitch on above.
Then follow steps 5-7 as before, pressing and stitching down.
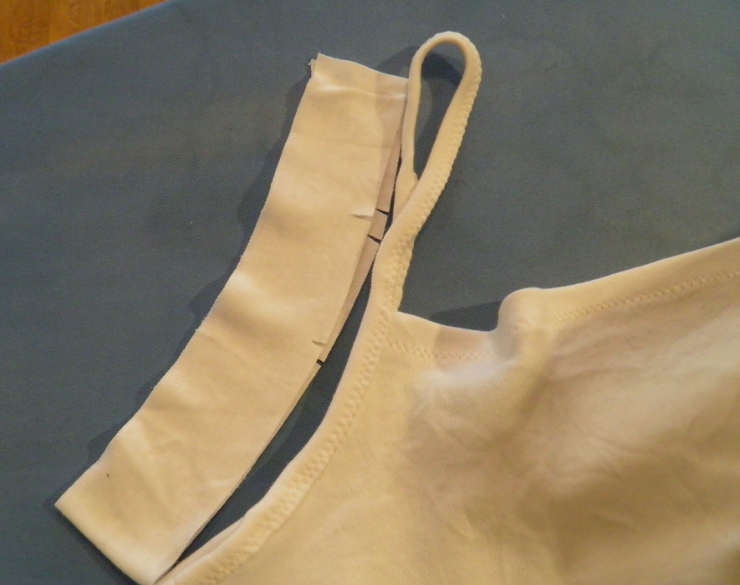
Elastic in the binding version #2 is on the left, and the no-elastic first attempt is on the right. Big difference, huh?

The elastic version measures almost 8 1/2 inches folded.
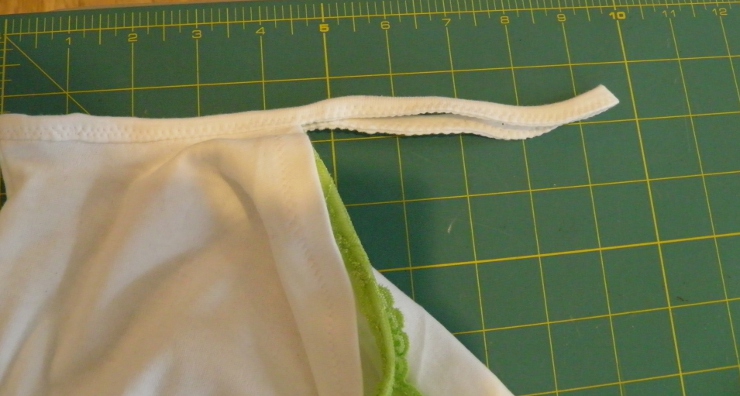
The no-elastic version measures pretty close to 10 inches – if you add a little for the wavy wonky way it is on laid the mat.
Before you all start adding a bunch of comments about why didn’t I use the coverstitch on my serger, I was trying this for a Kids Sew Camp project. None of the kids I sew with own sergers, so I need techniques that work on regular sewing machines, and in some cases, pretty crappy machines. I might need to start/help them with the elastic step, but I think the outcome will be decent if we use these steps instead.
How about you? Do you have any other tips that might help in applying binding to a knit cami on a sewing machine? Shout ’em out!
Happy sewing!
Maris