• Facebook
  • Instagram
  • RSS
  • Twitter
  • Skip to primary navigation
  • Skip to main content
  • Skip to primary sidebar
Sew Maris
  • Home
  • Classes
  • Tutorials
  • About
  • Contact
  • Shop
  • Blog

Tutorials

Tutorial: How to Make A Perfect Buttonhole

Buttonholes can induce a little anxiety, especially if you have to make ten or twelve of them on a shirt. But if you follow these simple steps, and practice, you will soon be making lovely buttonholes without batting an eyelash. Really!

Grainline Archer by Sew Maris

Please note: This post contains affiliate links and I will be compensated if you decide to purchase. Thanks!

Here’s what you need to get started:

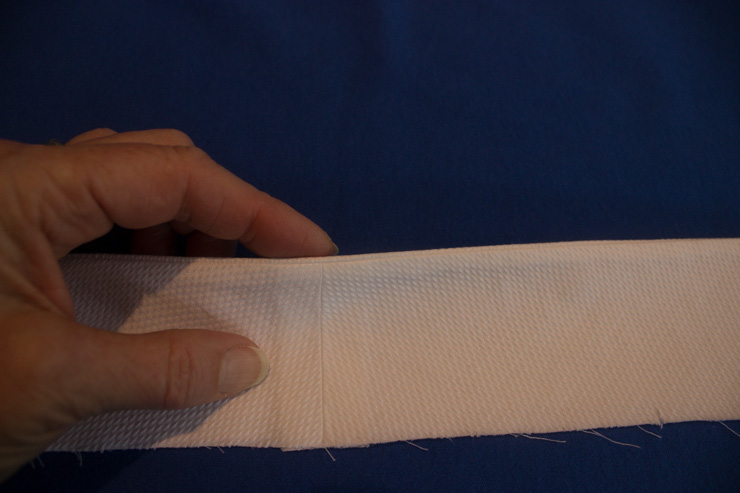
  1. A garment with appropriate interfacing applied to the area where buttonholes will be made
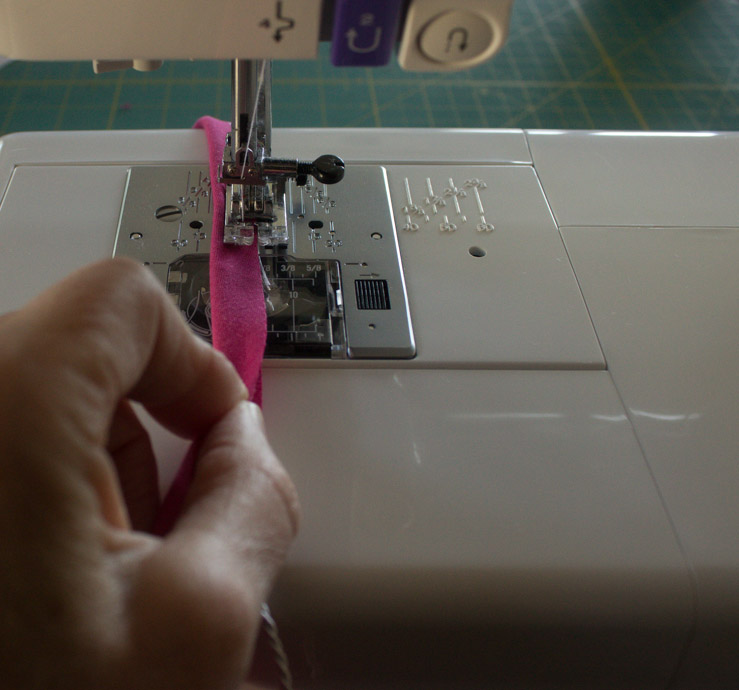
  2. Sewing machine with buttonhole foot
  3. Thread
  4. Water soluble stabilizer (like Solvy)
  5. Marking tool (I like the Frxion pens for this job)
  6. Optional: Simflex buttonhole marking tool
  7. Optional: Fray-check

How to Make a Buttonhole


How to make a perfect buttonhole tutorial by Sew Maris

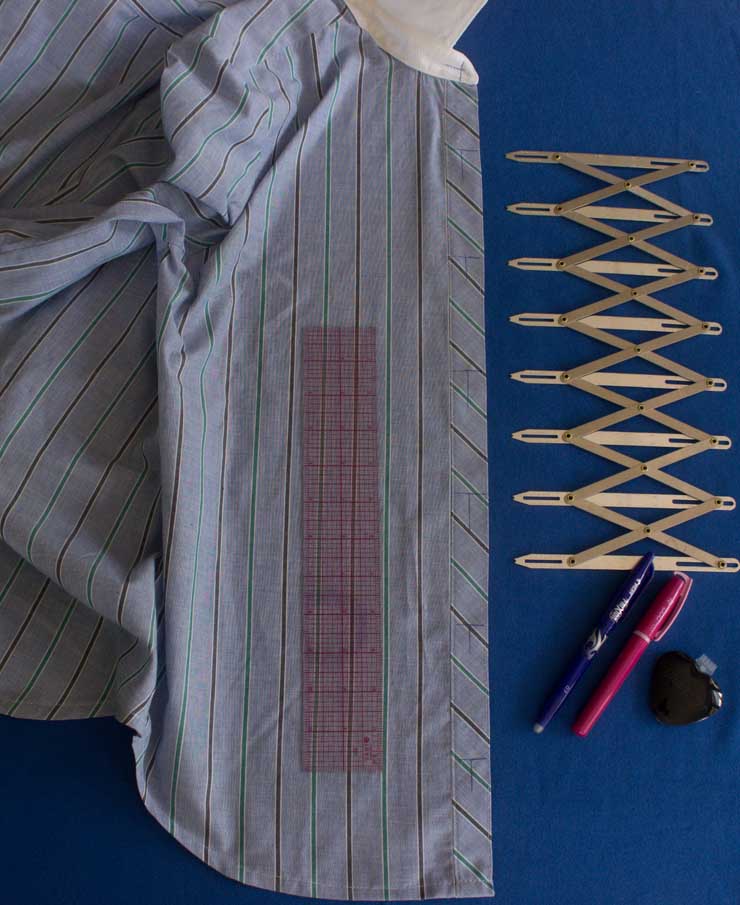
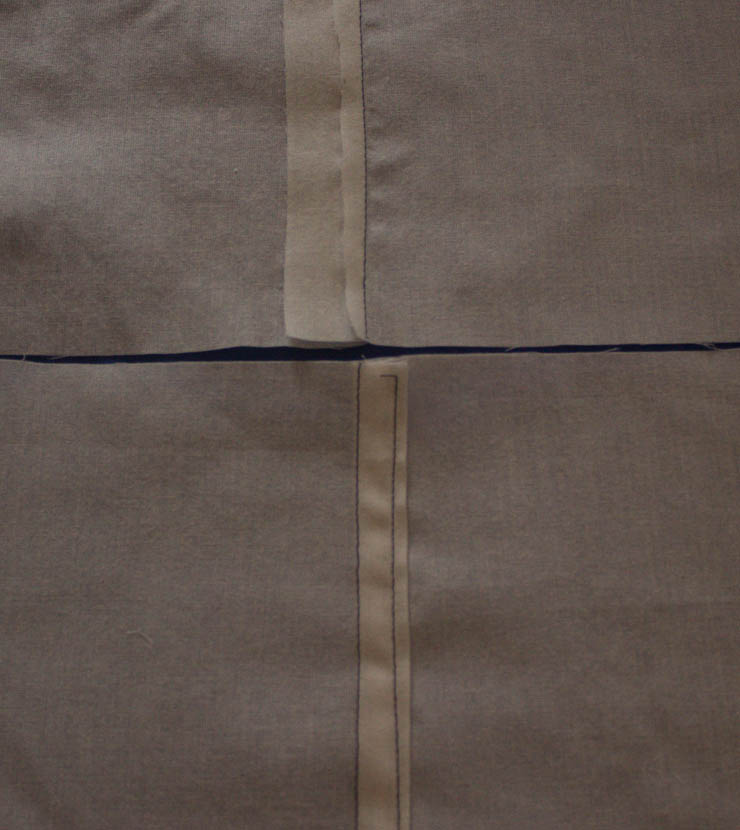
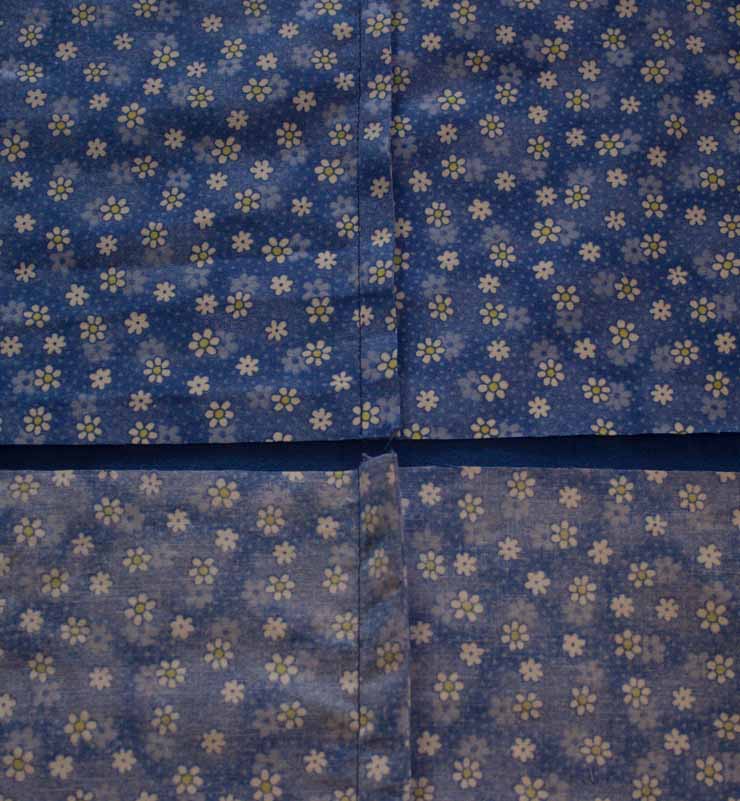
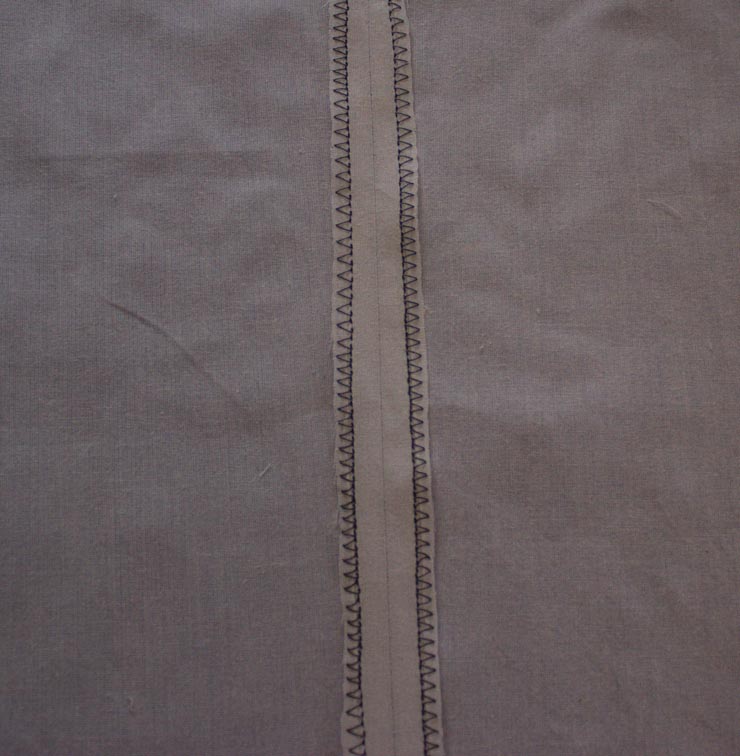
1. Using the pattern guide or a Simflex marking tool, mark the placement for your buttonholes on your garment. In the example above, the buttonholes are vertical, so I marked a horizontal line where the buttonhole needs to start, and a vertical line to keep my stitching correctly centered on the shirt front.

Hint: If your sewing machine automatically stitches the correct buttonhole length like mine does, you will only have to mark the starting placement line for the buttonhole,and the machine will determine the . correct ending point.

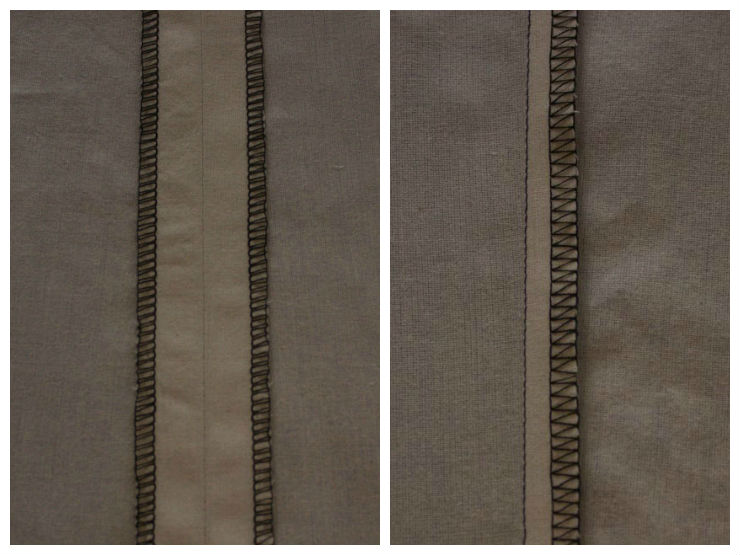
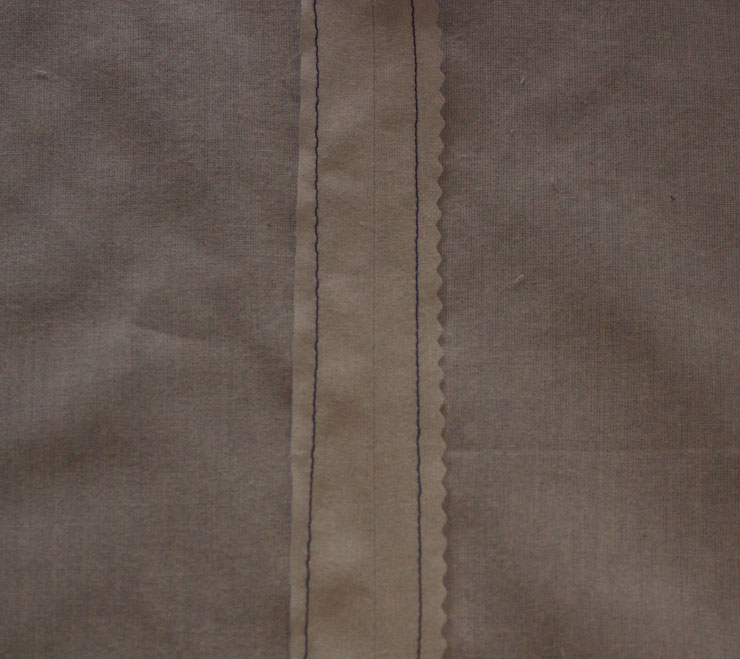
2. Select the buttonhole stitch on your sewing machine.

Hint: If you increase the stitch length slightly your finished buttonholes will look more ready-to-wear (RTW).

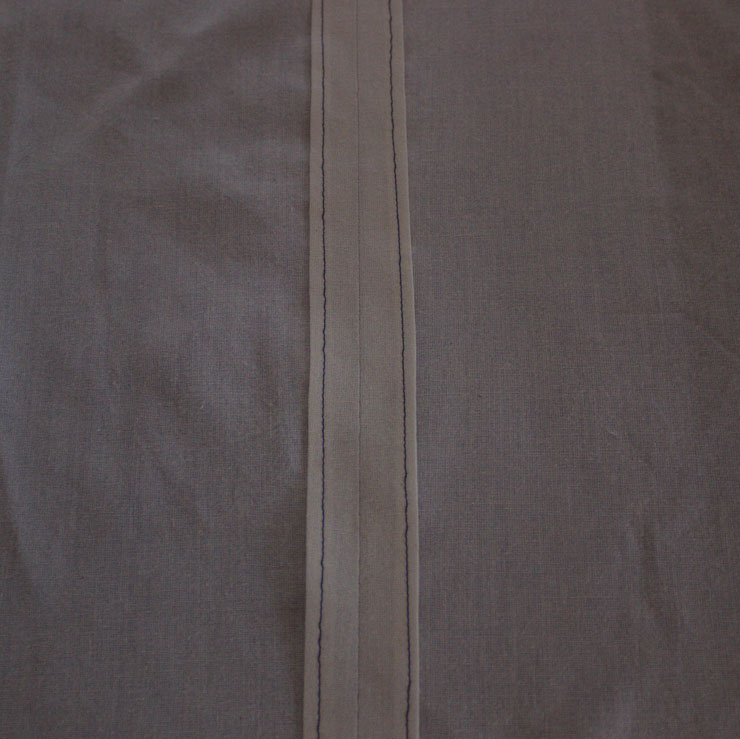
3. Cut two strips or enough rectangles of Solvy to place on top and underneath each buttonhole marking. (Make a “sandwich” of Solvy-garment-Solvy.)

How to make a perfect buttonhole tutorial by Sew Maris

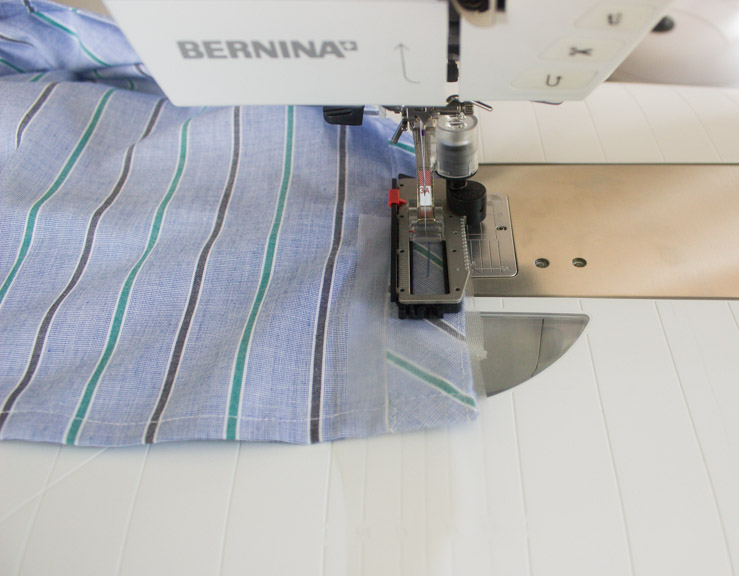
4. Align your garment under the buttonhole foot so the needle is at the beginning of the buttonhole mark, and stitch the buttonhole. Well, the machine does this part.;-)

How to make a perfect buttonhole tutorial by Sew Maris

5. Repeat until all your buttonholes are completed. That wasn’t so bad, was it?

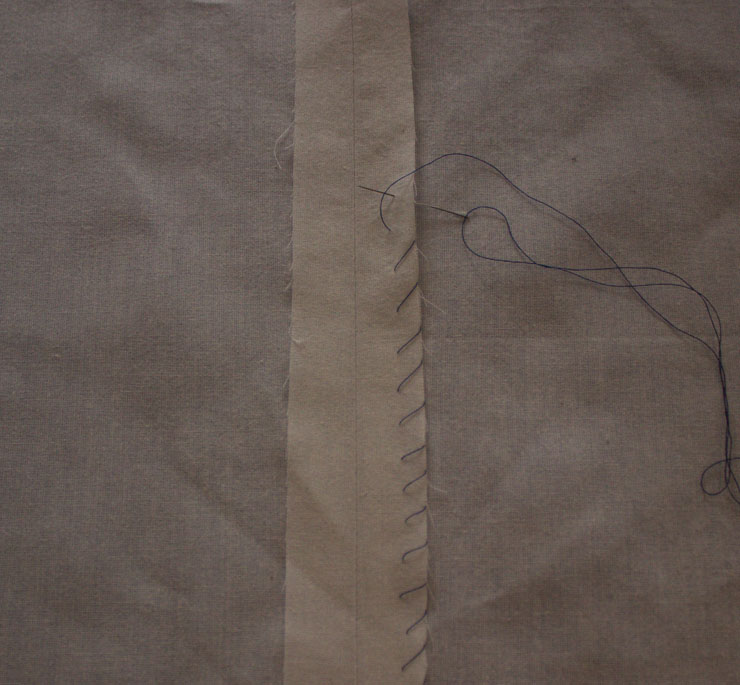
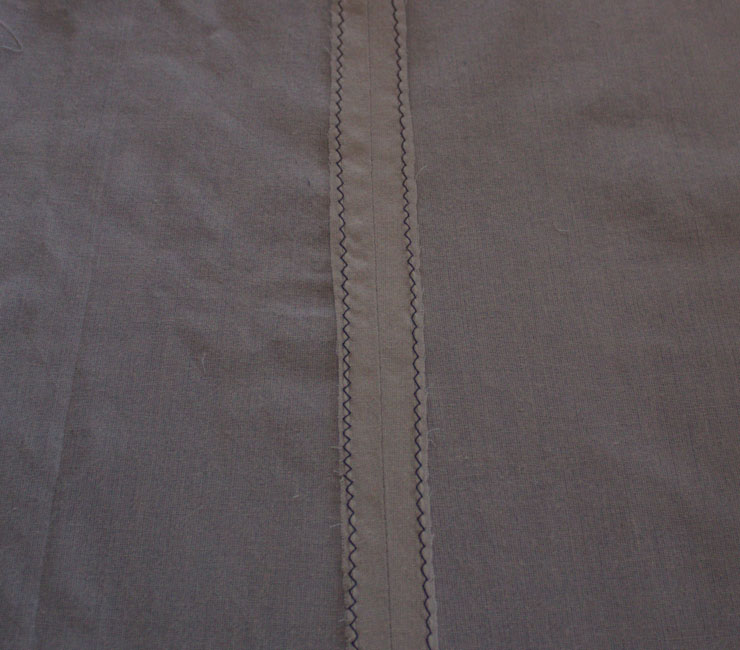
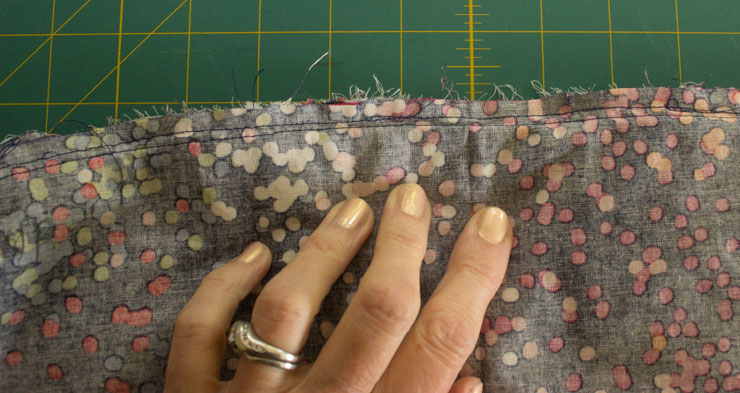
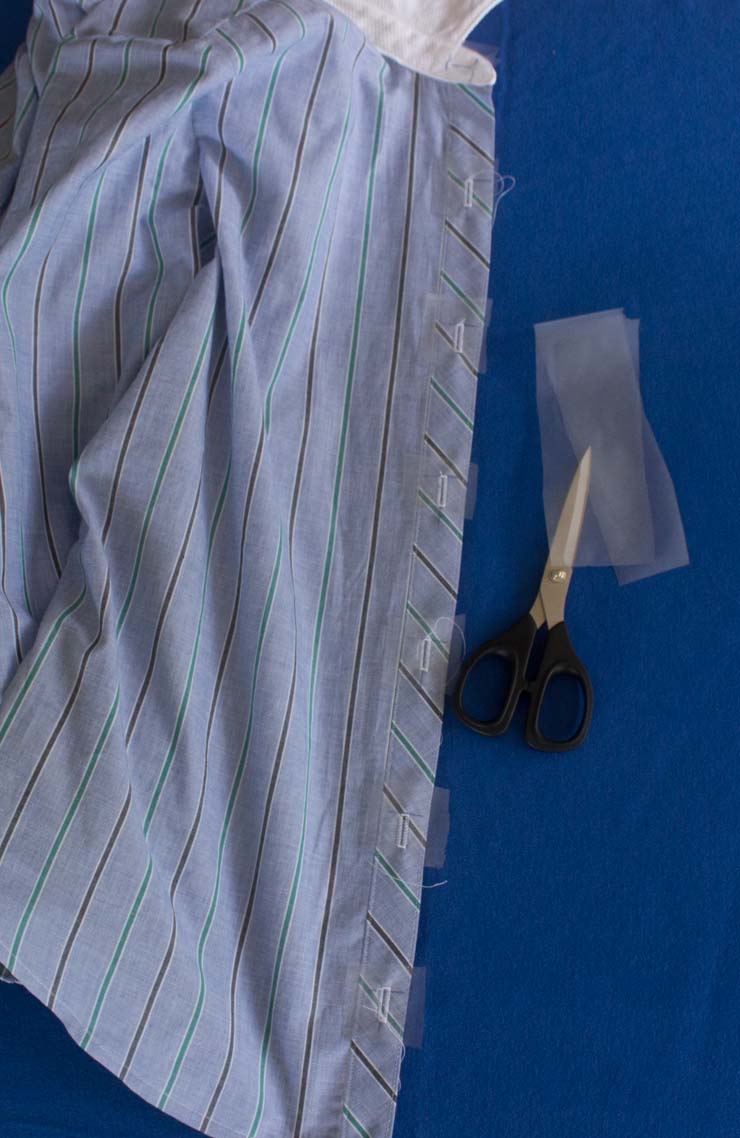
6. Gently tear off the excess Solvy around the buttonholes, and place a “line” of Fray-check in between the 2 rows of zig-zag stiching of each buttonhole. Let dry.

How to Make a Perfect Buttonhole tutorial by Sew Maris

7. Cut open each buttonhole. That’s it! Not so bad, especially with today’s modern sewing machines that really help simplify this task.

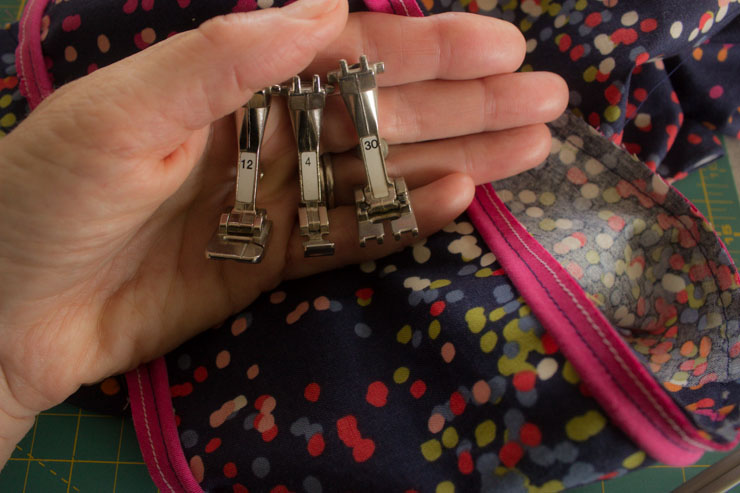
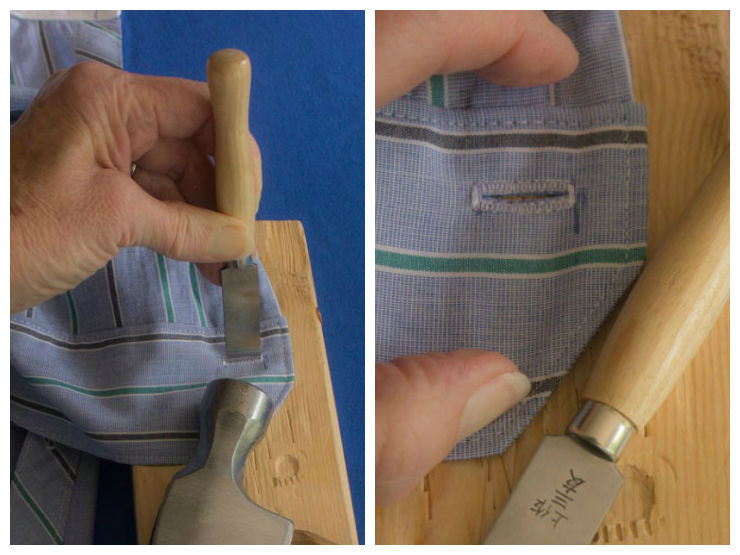
Hint: My preferred method of cutting through the garment is to use a Japanese 15 mm buttonhole cutter as shown above. The knife edge is both very sharp and very thin, so you are much less likely to cut into your stitches. You can also use a seam ripper to open a little hole in the buttonhole and finish cutting with a pair of sharp scissors, or you can fold the buttonhole in half and snip a hole with sharp scissors, too. Regardless of which technique you use, BE CAREFUL! If you cut through your stitches it is possible to “re-stitch” , but your buttonhole will look a little sad. 🙁

I hope this tute helps you make purrrr-fect buttonholes on your next garment. It really is just a series of little things that add up to making a better buttonhole. Be sure to practice on scraps before you tackle the “real” garment.

Happy sewing!

Maris


Tutorial: 10 ways to finish your seams

There are loads of different ways to finish a seam allowance; in this tutorial I will just cover ten of the methods that you might like to experiment with. Maybe you have a favorite or two in this grouping, and maybe you will be encouraged to try a few other finishes in the near future.

The purpose of a seam finish can be to:

  1. prevent raveling
  2. provide a decorative detail on the inside of a garment
  3. strengthen a seam
  4. reduce bulk

Seam Finish tutorial by Sew Maris

Felled seam

A felled seam is commonly used on jeans, men’s shirts, and other garments where a flat finish is preferred next to the body and extra strength is needed in the seam itself. Start by stitching the seam with the specified seam allowance, and then trim 1 side of the seam allowance to no more than 1/4 inch. Press the remaining seam allowance over the trimmed seam allowance, turn under, and stitch close to the edge. Well, I guess I stitched sort of close to the edge in my example—could have done a little better there. Sorry!

Seam Finish tutorial by Sew Maris

French seam

French seams are often used on sheer or lightweight garments, both to eliminate raveling as well as to provide a narrow seam allowance to minimize show-through. The key point to remember with French seams is you stitch the same seam 2 times—so the sum of both seam allowances needs to equal the total seam allowance for the garment. For example, for a 5/8 inch seam allowance, place the wrong sides of the fabric together and stitch a 1/4″ seam. Trim, press, then fold along the first stitching line so the right sides are together. Stitch the second seam 3/8 of an inch from the pressed fold. Perfect! A totally enclosed seam that equals 5/8 of an inch!

Seam Finish tutorial by Sew Maris

Hand overcasting

Often used in couture sewing to “lightly” finish the  seam allowances even on a lined garment, overcast stitch by hand along all seam allowances. It is a surprising fun and relaxing way to sew!

Seam Finish tutorial by Sew Maris

Hong Kong finish

A Hong Kong finish is most often used in an unlined coat or jacket to both prevent raveling and provide a decorative finishing element. Start with bias strips of fabric (lining fabric is a good choice with wool) about 1–1/1/4 inches wide, and with right sides together stitch a strip to each side of the seam allowance using a 1/4 inch seam. Press the bias strip away toward the raw edge, and fold it around to the back side of the seam allowance. Stitch in the ditch from the top side to secure the back of the bias strip. Trim any extra fabric on the back side.

Seam Finish tutorial by Sew Maris

Overlock with serger

Overlocking with a serger is a fast and easy way to finish seam allowances. You can serge either each seam allowance individually and press the seam open and flat, or you can serge the two seam allowances together. You can use either a 3-thread or 4-thread overlock stitch for this finish.

Seam Finish tutorial by Sew Maris

Overcast with sewing machine

Most sewing machines include an overcast stitch, which is similar in function to the overlock stitch on your serger.

Seam Finish tutorial by Sew Maris

Pink

Pinking produces a very flat seam finish, and gives a vintage look to the inside of your garments. Pinking requires a wavy blade for your rotary cutter or special pinking shears.

Seam Finish tutorial by Sew Maris

Straight stitch

A line of straight stitching close to the edge of the seam allowance can be used alone or in combination with a pinked edge to reduce raveling.

Seam Finish tutorial by Sew Maris

Turn and stitch

Turn each seam allowance to the underside 1/4 of an inch, and stitch with a straight stitch close to the edge.

Seam Finish tutorial by SewMaris

Zig-zag

Similar to the overcast stitch, a zig-zag stitch can also be applied close to the raw edge to reduce raveling.

Select the seam allowance you want to use based on your fabric, how the garment will be laundered, and the look you want for the final garment. It is a great idea to sample several seam finishes on leftover fabric to see what will work best.

Do you have a favorite seam finish you like to use? How many  of these 10 finishes have you tried in your garments?

Happy sewing!

Maris


Tutorial: How to Add Piping to a Seam

Adding a bit of piping in a seam is an easy way to give your finished garment some pizazz, and often a pop of color as well. I don’t really consider this to be a couture technique; tho some folks do. Really, it is easy. Just start by including it in a straight seam rather than something curved like a collar, and then after you get the hang of it you can go crazy.

Midriff bands or waist seams are no-brainer locations for piping. I naturally had to jazz up my DD’s Jenny Dress with some hot pink piping. The women in our family are not of the shrinking violet variety. 😉

Sisboom Jenny by Sew Maris

In this tute I am going to show you how to make only a short length of bias—using the strip piecing method. If you need yards of bias, Rachel on Coletterie has a lovely tutorial on making continuous bias tape. I want to focus here on how you add piping—either that you make yourself or purchase ready-made—into a seam for a polished, RTW detail in your garment seams!

How to add Piping to a garment seam by Sew Maris

So let’s just get down to it!


Piping Tutorial by Sew Maris

Supplies:

  1. 1/3 yard or more of fabric
  2. Cording of the desired circumference for your finished piping (I used the skinny 1/8″ cording not the fatty stuff in the pix above)
  3. Ruler
  4. Marking tool (Frixion pen, Chakoner, etc)

Determine Strip Width

This is your story problem for the day. See, you DO use math after you graduate. 😉

  1. Measure the width of your cording (mine was 1/8 inch).
  2. Double the width of your cording for the “wrap” circumference. (2 x 1/8 = 1/4)
  3. Double the desired seam allowance (2 x 1/2 =  1)
  4. Add the wrap circumference and the doubled seam allowance to determine the strip width. (1/4 + 1 = 1 1/4 inch strips)

Make the Piping

Piping Tutorial by Sew Maris

1. Press or mark a line at a 45° angle to the selvage edge of your fabric.
2. Cut on the marked line, being careful to cut straight and not stretch the bias edge of the fabric.
3. Cut several strips the “calculated strip width” as determined in step 4 above. (Hint: I never figure out the number of strips I need beforehand, but if you are extra math-nerdy you might want to do this. I just stitch up a few and then measure it against my seams to see it I need to add another strip or two.)

Piping Tutorial by Sew Maris
4. Right sides together, place one strip perpendicular to another. Mark a diagonal line from 1 short edge to the other short edge of your strips.
5. Stitch along the marked line, and trim the seam allowance to no more than 1/4 inch. Press open.
6. Continue as in step 5 above until your strip is at least a few inches longer than the seam the piping will be inserted into.
7. Fold the pieced bias strip over the cording, wrong sides together.

Piping Tutorial by Sew Maris
8. Using your regular presser foot, stitch with the left side of the presser foot against the cording. Do NOT worry that the stitching is not close enough to the cording; you are going to stitch this piping 2 more times before you are done, and the last stitching will be snuggied right up against the cord. Trust me!

Insert the Piping into your Garment

Piping Tutorial by Sew Maris

  1. Place your be-a-yoot-y-ful piping on the right side of whatever it is going to be stitched to. In my example, I stitched the piping to the midriff piece rather than the skirt or bodice sections. (Hint: It is not impossible to stitch piping to gathered fabric, but it is certainly harder than stitching it to a flat piece of fabric.) Pin in place, or be bold and don’t. 😉
  2. Move your needle 1 or 2 positions closer to the piping than your original stitching in step 8 above, and stitch the piping to the garment section. (Hint: Same as before—do not try to get right up against the cording. This stitching is navy in the image above, and the white thread is from step 8 in the Make the Piping section)

Now all you need to do is just finish your garment construction per your pattern instructions. In my example, the piping was stitched to the top edge and the bottom edge of the midriff section, so the next steps were to stitch the bodice and skirt pieces to the piped midriff section.

Piping Tutorial by Sew Maris

3. Right sides together, lay the remaining garment piece (skirt, in my example) on the piped piece (midriff, in my example). Pin and stitch on the piped fabric side (in my example, on the midriff) so you can see where to stitch a bit closer to the piping. In the image above my final stitching is closer to my fingertips, and the stitching that applied the piping to the midriff is closer to the raw edge.

Piping Tutorial by Sew Maris

Hint: A bulky cording foot is super helpful here if you have one, or a 3-tuck pintuck foot can work too. If you use a zipper foot you are going to have to pay attention and keep your stitching as close as possible to the piping.

4. Flip your garment to the right side, and check that your piping looks an even circumference for the entire seam length. Make any necessary adjustments—meaning, stitch a little closer or make friends with your seam ripper rip a bit and stitch again.

Sisboom Jenny by Sew Maris

Now that wasn’t so bad was it? And look at what a difference it makes in the finished product!

Happy sewing!

Maris


Tutorial: How to Iron the Collar When Making a Shirt

The collar is the main focal point of a shirt, so everything you can do to make this part of your garment as perfect as possible will help your garment achieve that “standard of excellence” we sewists all strive for with our garments.

How to iron a collar when making a shirt by Sew Maris
Ironing, or pressing, is an often overlooked or under-appreciated part of sewing. And they are different. Ironing involves sliding the iron across the fabric; pressing is lifting and setting down an iron with some pressure. If you take the time to really learn how to iron/press your garments during the construction phase, your finished garments will immediately look much more polished and professional. You can easily spend as much time ironing and pressing as sewing when making tailored clothes!!

How to iron a collar when making a shirt by Sew Maris

BTW, one of the tricks to a properly ironed shirt collar comes long before you get to the ironing board-it starts with cutting. That’s right, your  job will be much easier if you cut your under collar slightly narrower and shorter than your upper collar.

How to iron a collar when making a shirt by Sew Maris
Tools needed:

Wooden point presser

Steps to ironing a shirt collar during construction

1. Stitch the interfaced upper collar to the under collar.
2. Trim the seams to a scant 1/4”, and cut across the corners diagonally.

How to iron a collar when making a shirt by Sew Maris
3. Place one short end of the collar on the point presser, with the collar point at the tip of the presser. Iron the seam allowances open.

How to iron a collar when making a shirt by Sew Maris
4. Turn the collar so the long edge is on the point presser, and iron the seam allowance open.
5. Repeat with the other short end of the collar.

How to iron a collar when making a shirt by Sew Maris
6. Turn the collar right side out, and press the collar flat, favoring the seam edge so that the under collar is slightly to the under side of the finished collar. (See why cutting the under collar  slightly smaller is such a help??)
7. Topstitch if desired.

Now I expect all your shirt collars to look like total PERFECTION!! Let me know how that goes. 😉

Happy sewing

Maris

Tutorial: How to Set in a Sleeve Without an Easing Stitch

For some reason, learning how to set sleeves into blouses or dresses can cause some sewists to break out in hives. Part of the reason for this struggle can be poor pattern-drafting. Hear that! Not.Your.Fault! 🙂

But with a properly drafted pattern you can often set the sleeve in without adding an easing stitch to your sleeve. What I mean by a properly drafted sleeve is one with a high sleeve cap that only has about 1 inch or less of difference between the armscye stitching line and the sleeve stitching line. When the sleeve stitching line is only 1 inch longer than the armscye stitching line, you rarely need to run a gathering (easing) stitch to set in the sleeve. Don’t believe me? Here’s how to do it:

1. Start pinning sleeve to the armscye of the shirt, matching beginning, ending, front notches, back notches, and shoulder seam first. So far NO EASING. The sleeve and the shirt body should be matching at a 1:1 ratio from the edges to the notches.
NOTE: You should now see that the sleeve is slightly bigger than the armscye, and slightly more so between the shoulder and the back notches than the shoulder and the front notches.

Setting in a tailored sleeve tutorial by Sew Maris
2. Starting at the front notch, roll the armscye and sleeve over your finger. The armscye is next to your finger, and the sleeve on the top. Continue in this manner all the way to the shoulder, easing the sleeve to fit the armscye.

Setting in a tailored sleeve tutorial by Sew Maris
3. Starting at the shoulder, continue in the same manner toward the back notches. You will need to allow a little more of the sleeve to ease over your finger than you did in step 2, or instead of the “finger-rolling” you can just pin with a slight amount of ease on the sleeve side.

Setting in a tailored sleeve tutorial by Sew Maris

4.When you are finished pinning, all of the extra fullness in the sleeve should be distributed between the notches along the sleeve cap.

5. Place your sleeve + shirt body under your sewing machine, with the sleeve against the bed of your machine. By placing the garment “sleeve down” the feed dogs will help ease in the excess fabric.

Setting in a tailored sleeve tutorial by Sew Maris
6. Take a few stitches, and then stop with the needle down in the fabric. Reach between the sleeve and shirt body and smooth the sleeve before proceeding. You will need to do this multiple times when stitching the sleeve to help prevent puckers.

Setting in a tailored sleeve tutorial by Sew Maris
7. With your thumb underneath and remaining fingers on top, grab the shirt sleeve and roll the fabric over your hand. Continue stitching with your hand in this position,  pulling gently on the seam as you are stitching to smooth out puckers. You may also need to hold the seam behind the presser foot and pull gently from the back as you are stitching. Don’t forget to stop occasionally and smooth the fabric between the shirt body and sleeve as you are stitching.

Setting in a tailored sleeve tutorial by Sew Maris
8. When you are done, you should not have any puckers in the stitching, but you can see the slight extra fullness across the sleeve cap in this image above.

9. Finish the sleeve seam as desired, and press the shirt sleeve over a ham with the seam allowance toward the sleeve.

Setting in a tailored sleeve tutorial by Sew Maris

That’s it! If by chance you did get a pucker or two, unpick a few stitches and re-stitch. With a little practice (and a correctly drafted pattern!) setting a tailored sleeve into a shirt is definitely within your grasp. Give it a try and let me know how it goes.

Happy sewing!

Maris

Tutorial: How to add a vented sleeve band

Have you ever made a blouse or top and the sleeves ended up being shorted than you would have liked? C’mon, you know you have; it has happened to all of us who sew.

VentedSleeveBand_PinCover

I like to view these situations as “design opportunities” rather than disasters, and one of my favorite ways to add a little snap to an outfit with too-short sleeves is to add a vented cuff. It looks all designer-y-and-fancy, but it really is super simple. You can use the same fabric as the garment, or a contrast fabric can really add some pizazz. You can apply exactly the same technique to too-short-pants. This tutorial is a two-fer! 😉

Supplies needed:

  1. Sleeves to be lengthened
  2. Extra fabric to create a sleeve band
  3. Iron
  4. Matching thread
  5. Ruler
  6. Marking tool (tailor’s chalk, Frixion pen, Chakoner, etc)
  7. Sewing machine + basic sewing supplies

Let’s get this party started.
1. First, decide on the desired WIDTH of your sleeve band. To determine this, you need to start with the amount of LENGTH you want to add to your sleeves. You will be cutting a strip 2 x the number of inches you want to add, + 2 seam allowances. For my sleeve, I wanted to add 2 inches,  so I cut 2 strips of fabric 4.5 inches wide ((2 * 2 inches) + (2 * 1/4 inch seam allowance).
2. Now let’s figure out how long the sleeve band strips need to be. Start by measuring the circumference of your sleeve, and again you will need to add 2 seam allowances to this measurement. My sleeve measured about 11 inches, so I cut my strips 11.5 inches (11 inches + (2 * 1/4 SA)
3. Fold your sleeve band strips in half the long way, right sides together.

Vented sleeveband tutorial by Sew Maris
4. Using your marking tool, draw a line from the seam allowance at the short end of the band to the fold. I like to angle this line inwards a little as it gets closer to the fold because it creates a nice “V” on the finished band. Your choice—draw a straight line just marking the seam allowance you used in # 2, or start at the seam allowance and angle the line a bit toward the middle as you get to the fold edge. I angled my line about 1/2 inch at the fold edge. It is hard to see in the image above because of my fabric, but squint your eyes and you will see yellow lines at the short ends, and the lines angle toward the middle of the sleeve band.

Have you ever made a blouse or top and the sleeves ended up being shorted than you like? C’mon, it has happened to all of us.   I like to view these situations as “design opportunities” rather than disasters, and one of my favorite ways to add a little snap to an outfit with too-short sleeve sis to add a vented cuff. It looks all designer-y-and-fancy, but it really is super simple. You can use the same fabric as the garment, or a contrast fabric can really add some pizazz.    Supplies needed: Sleeves to be lengthened Extra fabric to create a sleeve band Iron Thread Ruler Marking tool (tailor’s chalk, Frixion pen, Chakoner, etc)  Let’s get this party started. 1. Determine the WIDTH of your sleeve band. To determine this, you need to start with the amount of LENGTH you want to add to your sleeves. You will be cutting a strip 2 x the number of inches you want to add, + 2 seam allowances. For my sleeve, I wanted to add 2 inches,  so I cut 2 strips of fabric 4.5 inches wide((2*2 inches)+ (2 * 1/4 inch seam allowance).  2. Now let’s figure out how long the sleeve bands need to be. Start by measuring the circumference of your sleeve, and again you will need to add 2 seam allowances. My sleeve measured 11 inches, so I cut my strips 11.5 inches (11 inches + (2 * 1/4 SA) 3. Fold your sleeve band strips in half, right sides together, and press with your iron. 4. Using your marking tool, draw a line from the cut edge of the stitching line at the short end of the band to the fold. I like to angle this line toward the center a little because it creates a nice “V” on the finished band. Your choice - draw a straight line marking your seam allowance you used in # 2, or angle the line at the fold edge a bit. I angled my line about 1/2 inch at the fold edge. 5. Stitch the short ends of the sleeve band. Trim seam allowances to 1/4”, turn and press. 6. Fold your sleeve in half, and place a pin at the fold line marking the outside center of the sleeve.  7. Right sides together, place one edge of the sleeve band at the bottom of the sleeve “center” pin. Continue pinning the sleeve band around the bottom edge of the sleeve, making sure the short ends of the sleeve vent meet at the center pin.  8. Stitch the sleeve band to the sleeve, using the seam allowance you determined in step #1. 9. Trim and press the seam allowance toward the sleeve, and topstitch on the sleeve side catching the seam allowance in the stitching.
5. Stitch the short ends of the sleeve band. Trim seam allowances to 1/4”, turn and press. In the image above, the fold edges are at the bottom of the picture, and the top band has been trimmed,and the bottom band has only been stitched.

Have you ever made a blouse or top and the sleeves ended up being shorted than you like? C’mon, it has happened to all of us.   I like to view these situations as “design opportunities” rather than disasters, and one of my favorite ways to add a little snap to an outfit with too-short sleeve sis to add a vented cuff. It looks all designer-y-and-fancy, but it really is super simple. You can use the same fabric as the garment, or a contrast fabric can really add some pizazz.    Supplies needed: Sleeves to be lengthened Extra fabric to create a sleeve band Iron Thread Ruler Marking tool (tailor’s chalk, Frixion pen, Chakoner, etc)  Let’s get this party started. 1. Determine the WIDTH of your sleeve band. To determine this, you need to start with the amount of LENGTH you want to add to your sleeves. You will be cutting a strip 2 x the number of inches you want to add, + 2 seam allowances. For my sleeve, I wanted to add 2 inches,  so I cut 2 strips of fabric 4.5 inches wide((2*2 inches)+ (2 * 1/4 inch seam allowance).  2. Now let’s figure out how long the sleeve bands need to be. Start by measuring the circumference of your sleeve, and again you will need to add 2 seam allowances. My sleeve measured 11 inches, so I cut my strips 11.5 inches (11 inches + (2 * 1/4 SA) 3. Fold your sleeve band strips in half, right sides together, and press with your iron. 4. Using your marking tool, draw a line from the cut edge of the stitching line at the short end of the band to the fold. I like to angle this line toward the center a little because it creates a nice “V” on the finished band. Your choice - draw a straight line marking your seam allowance you used in # 2, or angle the line at the fold edge a bit. I angled my line about 1/2 inch at the fold edge. 5. Stitch the short ends of the sleeve band. Trim seam allowances to 1/4”, turn and press. 6. Fold your sleeve in half, and place a pin at the fold line marking the outside center of the sleeve.  7. Right sides together, place one edge of the sleeve band at the bottom of the sleeve “center” pin. Continue pinning the sleeve band around the bottom edge of the sleeve, making sure the short ends of the sleeve vent meet at the center pin.  8. Stitch the sleeve band to the sleeve, using the seam allowance you determined in step #1. 9. Trim and press the seam allowance toward the sleeve, and topstitch on the sleeve side catching the seam allowance in the stitching.
6. Fold your sleeve in half, and place a pin at the fold line marking the outside center of the sleeve. Fold your band in half and also mark the center with a pin.

PinnedSleeveBand
7. Now you are ready to pin the sleeve band to the sleeve.

  • Right sides together, place the sleeve band on top of the sleeve.
  • Make sure that the two “vent” edges of the sleeve band meet at the “center” pin you marked on the sleeve, and the “center” pin marked on the sleeve band is at the at the sleeve seam.
  • The raw (cut) edges of the sleeve band are on top of the raw edge of the sleeve. This means the fold of the sleeve band should be oriented towards the shoulder seam.
  • Pin all around the sleeve circumference.
  • Make sure you do not place the vent edges of the band at the sleeve seam, or your designer detail will be under your arm and no one will see it! 🙂

8. Stitch the sleeve band to the sleeve, using the seam allowance you determined in step #1.

Vented sleeve band tutorial by Sew Maris
9. Trim and press the seam allowance toward the sleeve, and topstitch on the sleeve side. Be sure to catch the seam allowance in the stitching so they do not poke down toward the sleeve band while wearing.

You are done, and you have a snazzy looking sleeve that is actually the length you want for the garment. Win-win!

Happy sewing!

Maris

« Previous Page
Next Page »

Primary Sidebar

Archives

  • Facebook
  • RSS
  • Twitter

Copyright © 2022 Sew Maris on the Foodie Pro Theme