Alright friends, the pattern drafting I am going to explain today is going to blow.your.mind. But in a good way. 😉
Let’s just say I am not a fan of the sewn-on buttonhole placket. Ridge-y seam allowances are not your friend when you are trying to create perfect topstitching and lovely buttonholes. So, if you want to replace the sewn-on version with a cut-on version you are in the right place. Caution: math and pattern-drafting will be required if you proceed!
To start this whole process, you need to decide 2 things:
- how wide you want the finished front placket
- how far from the edge you want your topstitching to be (minimum of 1/8 inch)
I am going to use the following assumptions to show you how to convert a shirt front with a sew-on front placket to a cut-on placket:
- My original pattern is the Grainline Studios Archer Button-Up shirt for women, which includes a 1 inch sew-on buttonhole placket
- My finished buttonhole placket will be 1 1/4 inches wide
- My topstitching will be 1/4 inch from each edge of the front placket
I made a quick little video that might help get your brain wrapped around this whole concept. (BTW – I used different starting assumptions in my video – just to show you that there is nothing magic about the above assumptions!)
Hopefully that helped you get a “visual” idea of where we are going with this drafting exercise.
Next, let’s talk about exactly how you would draft a new right front (for women) pattern piece, starting with the Grainline Studio’s Archer pattern, and creating a placket that is 1 1/4 inches wide with topstitching 1/4 inch from each placket edge.
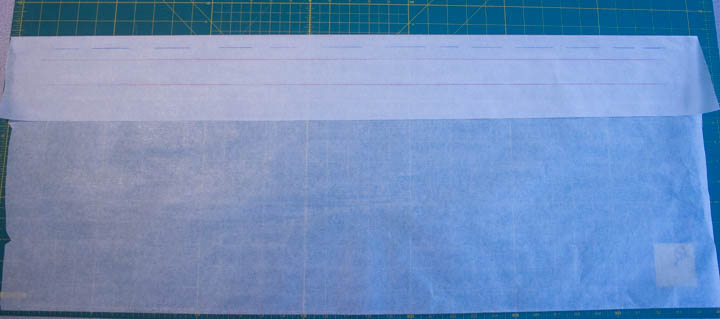
1. Cut a piece of tracing paper that is a few inches longer than the Archer (right) front pattern piece.
2. As you face the tracing paper, draw a line an inch or so from the right edge of  tracing paper, and the full length of the paper. This line is going to be the new “cutting line” for the front edge of the right shirt front.
3. Draw a second line 1 1/4 inches away from the first line drawn. After construction, this is going to be the front (or outer) edge of the buttonhole placket.
4. Draw a third line 1 1/4 inches away from the second line drawn. After construction, this is going to be the inner edge of the buttonhole placket.
5. In between the second and third line, draw a dashed line exactly in the middle, which is 5/8 inch from either line. Mark this dashed line Center Front. My CF line is blue, and hopefully you can see all my other lines are red. 🙂

6. Draw a fourth line 1/2 inch from the third line. Mark this area “pleat”.
7. Fold the paper on the third line that you marked “inner edge of front placket”.
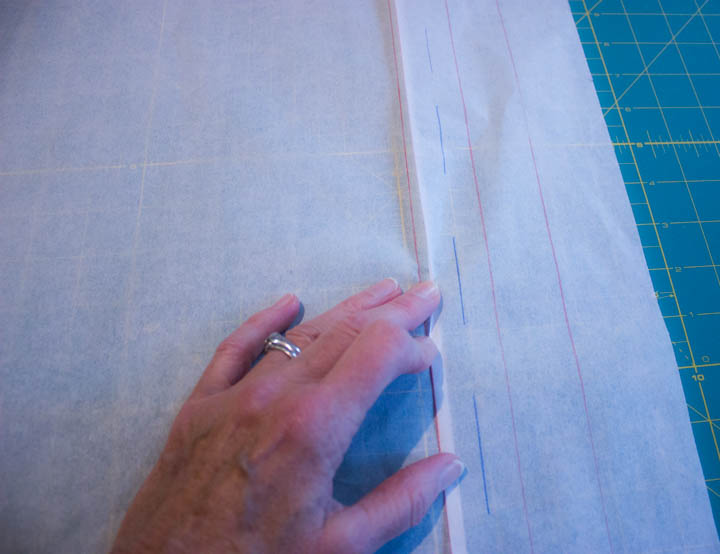
8. Turn the paper over, and bring the third line to meet (line up with) the fourth line. Tape the placket “pleat” down the full length temporarily with painter’s tape. This will hold the pleat in place so you can trace off the remainder of the shirt front pattern.
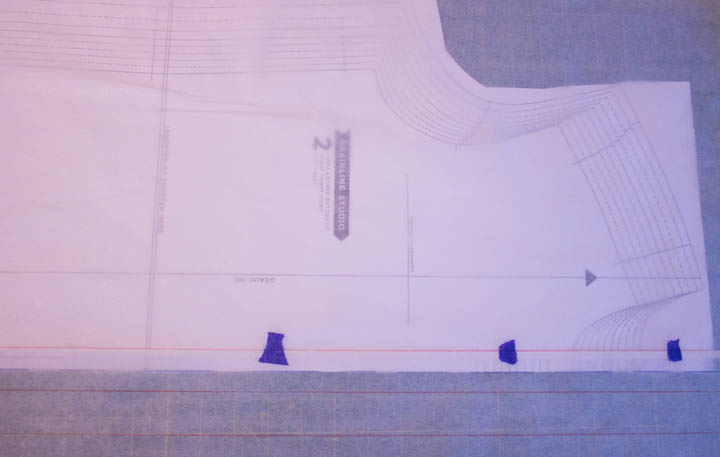
9. Align the CF (blue dashed line in my pix) of the tracing paper with the CF of the Archer pattern piece (the cutting line).Â
10. All the hard work is done! Now just trace around the correct Archer size you want, and cut it out. Don’t forget to draw the grainline and the pocket placements, as well as the notches. Take off the temporary painter’s tape holding your pleat down, press the pattern flat, and voila! Â You just drafted a cut-on placket for the Archer!
Sooo, now that you know how to adjust a pattern to create a cut-on buttonhole placket, why in the world would you ever use a sewn-on placket. In a word, friends. grainline. Also, different fabrics. The only time I use a sewn-on placket is when I want to vary the grainline (bias, cross grain, etc) to add some visual interest to the front of my shirt, or I want to use a contrast fabric.
Now you know both options, and some reasons why you might like both, and you get to be in control of which process is best. Ain’t sewing grand?
Happy sewing!
Maris