There are (at least) two ways to insert sleeves in your Archer, and I am going to show you both methods I use.
First up, the easier one; stitch and serge the sleeves to the sleeve to the body of the shirt BEFORE stitching up the side seam of the shirt. Now this method requires that the sleeve armscye is the same length (or almost the same) as the armhole of the shirt. Luckily, it works like a charm on the Archer. If you want to try it on a different pattern, just make sure to measure along the stitching line of the sleeve and the armscye first!
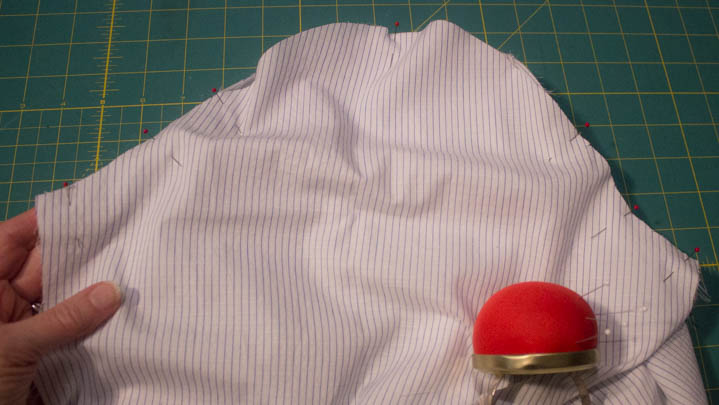
Here’s how I approach it. Pin from the outer edges to the notches on the back and front side of the sleeve, and also pin the shoulder point. What remains is the amount of ease that needs to be distributed between all those “fixed” points.
With the sleeve on the bottom, I just roll the armscye/sleeve over my finger to smoothly distribute the extra fabric. You can read my tutorial about setting in a sleeve with out an easing stitch for more deets.
After the pinning, all that is left is to stitch on your machine, and then serge finish the raw edge. Super simple. I like to stitch first and then serge just because I think it looks better, and I am also much more accurate at stitching on my sewing machine than I am on my serger. Your call if you want to skip the sewing machine step.
Now, if you want to try a RTW felled look for your sleeve shoulder seam, there is a little more to it.
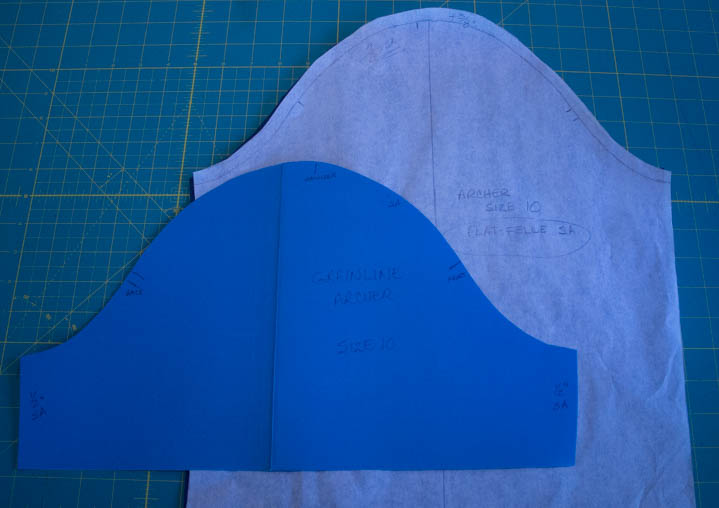
Start off by adding 3/8″ to the cap of the Archer sleeve pattern. Obviously you have to do this step before you cut out your sleeve. So now you have a 7/8″ SA on the sleeve cap,and 1/2″ SA on the armsyce.
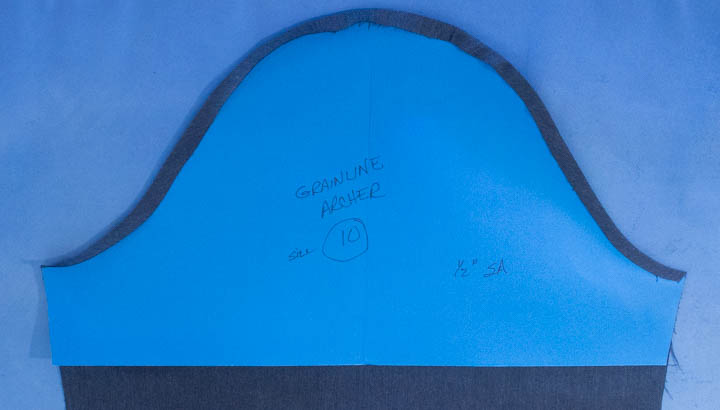
Next step is to press 3/8″ of the sleeve cap over onto the sleeve. You can either draw a line around the sleeve cap, or create a manila folder template identical to your sleeve pattern, with 1/2″ seam allowances on the cap and the side seams, too. In this pressing step you will draw a chalk line on the RS of the fabric, or place the template on the RS of the sleeve, and press the WS 3/8″ on top of the RS. Confused yet? 😉
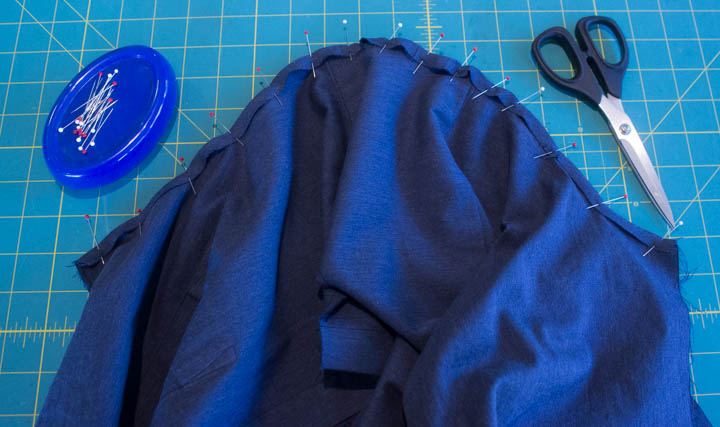
Now let’s pin the sleeve to shirt. The idea is to slip the shirt body under that fold you just pressed across the top of the sleeve. Lay the sleeve down RS facing up. Lay the RS of the shirt body (back, yokes, front) onto the RS of the  sleeve. The edge of the shirt should be slipped under and butting up against the pressed sleeve fold. Pin from each end to the front + back notches with a 1:1 match, then pin the shoulder notch, then distribute the sleeve ease evenly across the body. This pinning process is identical to the one used in the stitch and serge method.
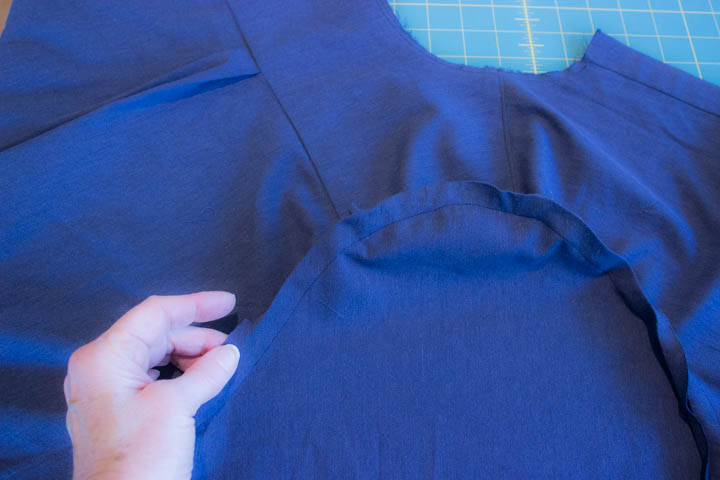
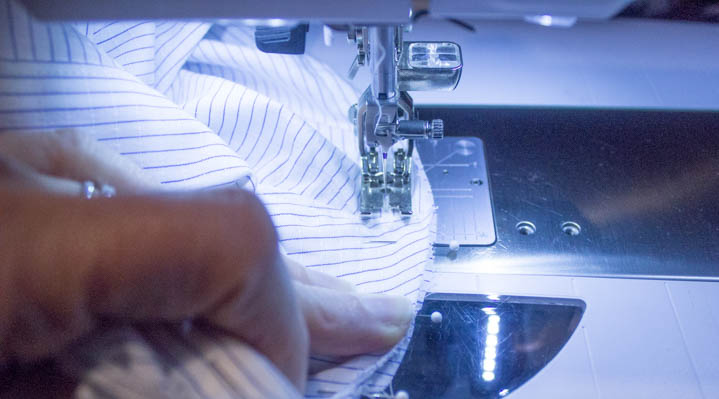
With the sleeve against your sewing machine, stitch the sleeve to the body using a 1/2″ SA. Go slowly, and avoid puckers. You should be stitching just the sleeve to the body; the foldover portion of the sleeve does not get caught in this stitching. The image above is the WS of the shirt, and you can see the foldover pressed onto the sleeve cap is free. Press well!
Now, from the WS, glue baste or pin, or both, the pressed edge of the shoulder seam to the body of the shirt. The pressed sleeve edge now is laying against the WS of the shirt body.

From the RS, topstitch on the shirt body approximately 3/8 – ½†from sleeve shoulder seam. I keep my  presser foot against the seam well, and move my needle over to the position I want. The goal is to stitch perfectly straight from the right side of the shirt, and also catch the foldover edge of the sleeve cap on the WS.

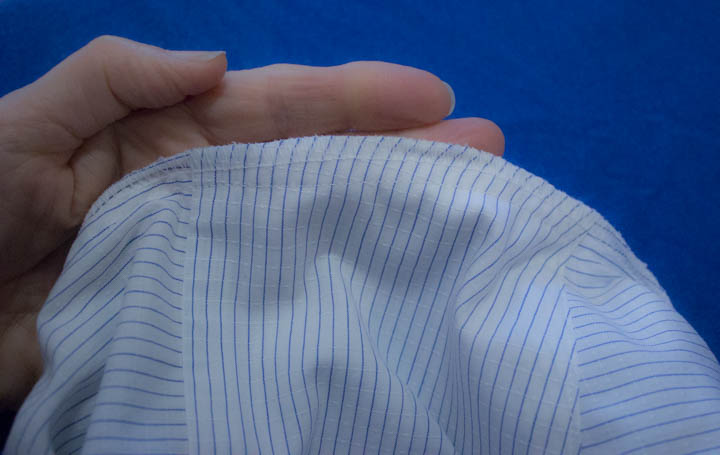
Looks pretty good from the RS.
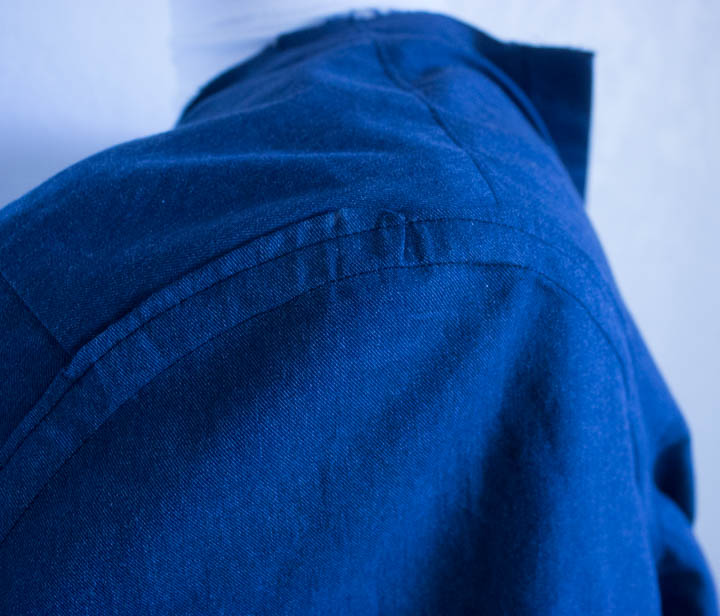
Admittedly, not as perfect from the WS, but the few remaining RTW shirts belonging to my DH look exactly the same, so I am OKÂ with this stitching. Some shirts come together 100% perfect on both sides, and some don’t. You will need to decide if and when you rip out the topstitching, but since I always rip out ALL the topstitching and start from scratch, this works for me.
Happy sewing!
Maris