I loved the Romy Anorak as soon as I saw it on the Style Arc site. Big dramatic collar, practical raglan sleeves for comfort, long enough to actually keep dry in a rainstorm, what’s not to love? The casual vibe totally suits my lifestyle and the Pacific Northwest, and with our rainy climate it is not possible to have too many jackets. Not.Possible.I.Tell You.
So of course I ordered it, and started dreaming about my fabric options. Despite the practicality of black or grey in my wardrobe – bleah. We need some color in the grey NW. Blue, teal or purple were on my mind. Sandwashed silk was my preferred fabrication. I even bought some. And some apple green lining.
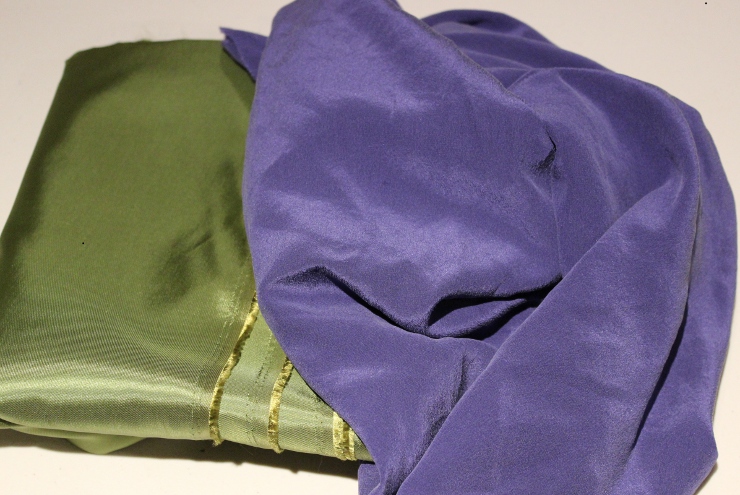
But the periwinkle silk refused to become Romy. Instead, it demanded to become Georgia. OK, OK. Georgia you will be. But that is for another post.
Instead, the purple Silkara I bought from Seattle Fabrics maybe 10 years ago started screaming from it’s storage drawer to become Romy. It was one of my original color choices, and had the added advantage of a DWR finish. Bonus points in Seattle. I cut out the pattern pieces, and the jacket. I decided against lining, so I also added 1/4 inch to every vertical seam allowance so I could flat-fell all the seams.

I assembled the entire jacket shell first, including sleeves, flat-felling each seam. Since my fabric did not press well, I had to stitch the 5/8†SA, trim one side, then press the remaining full seam allowance for the felling/topstitching step, and immediately run to the sewing machine to stitch it down before I lost the press mark. Time consuming, but totally worth it. No ravel-y threads inside for me! Of course the only down side is the extra time required for double-stitching every seam, but a small price to pay for a clean finish.
I didn’t bother with the pocket construction at this point, tho the instruction sheet did specify constructing these before assembling the jacket. Whatever. I usually just give a casual nod to the Style Arc instructions. As usual, I found that all of the Romy pattern pieces fit together beautifully. Love their notch clipping/marking system, and the <for the most part> superb drafting. Still all smiles about my project.
Next up was attaching the collar. I stitched the outer collar to the inner collar along the top edge, leaving the neck edge and the 2 short ends open. I decided to try the “burrito†method of attaching the body of the jacket to the collar. Right sides together, I pinned the outer collar to the jacket, and then rolled up the jacket as tightly as possible and wrapped the inner collar around the jacket and was able to pin it to the neckline edge (1/4″ SA!!). It was a tight fit to roll the entire jacket inside the 2 collar sections, but I was going for a clean finish using machine stitching as much as possible. If you are not familiar with the burrito construction process, read this burrito pillowcase tutorial and think of the collar as the pillowcase cuff, and the jacket as the pillowcase body. Still all smiles.
Front plackets, zipper, and facings were next on the docket. I stitched both short ends of both plackets. I looked at the technical drawing and saw that the zipper teeth were aligned close to the front placket seam, so I basted the zipper to the left jacket front. Then I placed one of the front plackets on the left jacket front edge on top of the zipper, and this is when I realized I should not have stitched the inner collar all the way to the jacket front edge. So ripped a few inches back on the inner collar. I continued assembling the jacket front/zipper/placket/facing sandwich, and turned the inner collar and hem allowance over to the front. Time to stitch. Ruh roh. A couple of things were not assembled in the proper order, so ripping and re-stitching ensued. Still sort of smiling.
Oops. Still some hems and other things were not quite right, so more ripping and stitching. Maybe a little swearing and mild snarling happened. Turns out the third time was the charm. Left front placket in place correctly and all edges finished off cleanly. Happiness. Of course since I had learned a few things on the left front placket, the right front placket and zipper went in correctly the first time. Big smiles again.
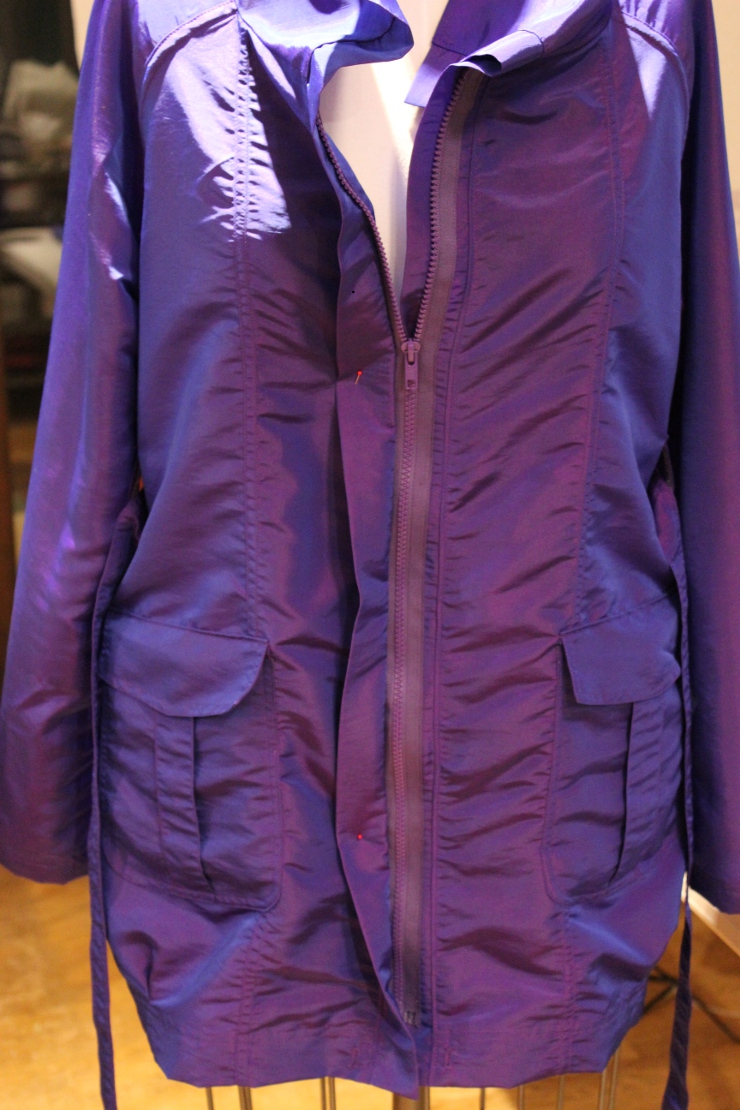
Until I zipped up the jacket. MAJOR swearing. HUGE snarling. With both sides of the zipper set into the front placket seam allowance the right front placket was almost completely on top of the left front JACKET instead of directly on top of the left placket. I went back to the placket pattern piece, and noticed that center front was marked on the FOLD line of the placket piece. WAH-aatt the what? The two folds are supposed to butt together? Seems like an obvious pattern marking error to me – where would the zipper end up? SHEESH almighty!
I went back to the technical drawing. It still looked like the zipper was set into the seam allowance to me. The H with it. I ripped off the right placket and moved the zipper tape as far out of the seam allowance as I could and still catch it in the stitching. Right side done. I ripped the left placket off again (yes, third time ripping!), and zipped the left side of the zipper to the right side. I aligned the plackets so the right placket completely covered the left placket, and marked where the edge of the zipper tape should be to keep my best-i-can-do-in-the-situation alignment happy. I stitched the left placket back together without the zipper in the seam, and topstitched the left side of the zipper to the left placket. Aren’t I totally au courant with half an exposed zipper tape? It was either that or burn the damn jacket. 😉
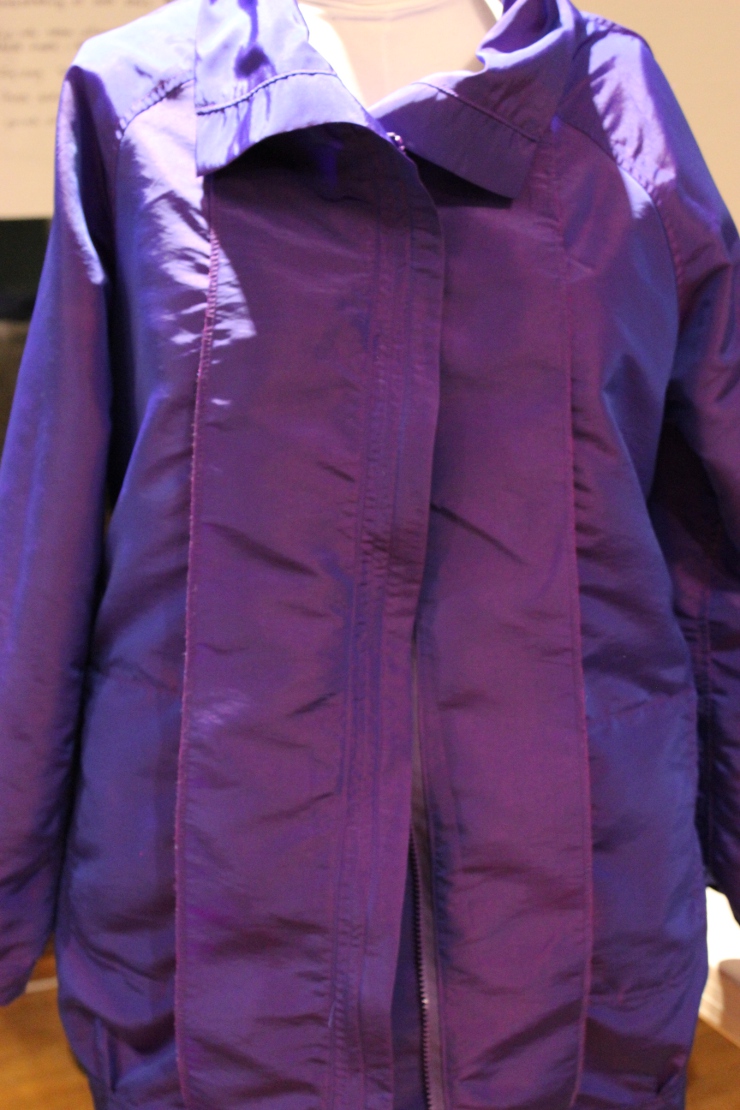
Full Monty of the zipper exposure:
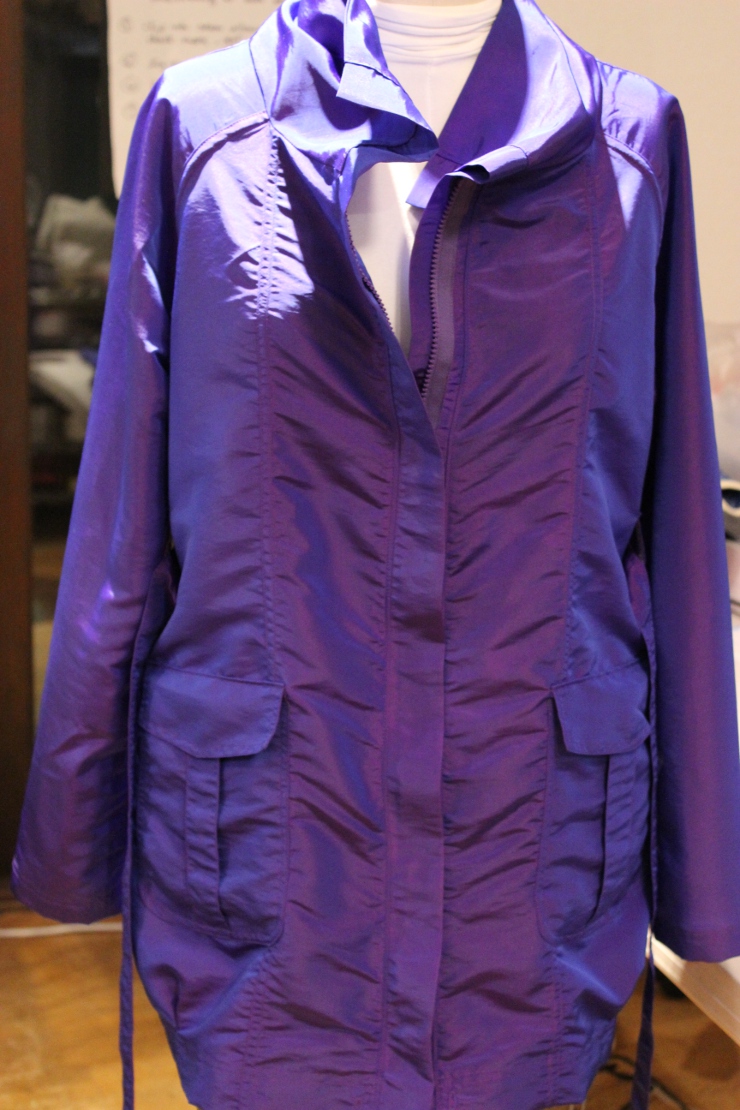
Normal zipper look when the plackets are not pinned back:
The pockets, belt and belt loops were easy peasy – just lots of double stitching. I pressed and stitched the pleats into the outer pockets, and then cut out a lining piece of grey silk organza so the inside of the pockets didn’t ravel either. Stitched in the pleats in the bottom, and hemmed the bottom and the sleeves. Not sure how many hours later I had a jacket I love. The color, shaping, and detail is perfect for me. I need to attach some snaps or velcro at the collar and on the pockets, but that is all. Except for the front placket issue it was a dream to sew. I especially love the shape of the jacket on the body – it manages to avoid the dreaded teddy-bear-tied-in-the-middle look. Yay! Maybe I will even make a matching rain hat!
A closeup of some pocket topstitching loveliness:

And isn’t that inside view purty?

Yep, the plackets kicked my butt, but I am still super happy I made Romy. See how happy I look?
If you decide to make a Romy for yourself, below is my cheater suggestion of how to assemble the plackets. These instructions assume you have stitched both short ends of both plackets. I think the correct solution is to re-draft the front plackets so the zipper insertion in the seam allowance keeps the plackets/actual center front aligned, but if you don’t want to do that this technique will get a reasonable result.
Right side placket:
- Place the RS of the placket on the RS of the right jacket front.
- Place the RS of the right zipper on top of the placket, aligning it so the zipper tape will be caught in the stitching – but just barely.
- Fold the inner collar over the placket, and turn up the inner collar hem allowance at the neck edge.
- Fold the bottom hem allowance over the placket, turning the hem “turndown†under.
- Place the facing on top of everything, and stitch, backstitching at both ends.
Left side placket:
- Place the RS of the placket on the RS of the right jacket front.
- Fold the inner collar over the placket, and turn up the inner collar hem allowance at the neck edge.
- Fold the bottom hem allowance over the placket, turning the hem “turndown†under.
- Place the facing on top of everything, and stitch, backstitching at both ends.
- Zip the zipper together, and mark where the zipper tape should be positioned to enable the right placket to lay completely over the left placket.
- Stitch the zipper down to the left placket only, using 2 long rows of stitching to secure the tape.
Happy sewing!
Maris