Zippers actually freak you out a little, don’t they? Especially the invisible ones.
I am here to tell you that if you follow my suggestions, you are going to fall in love with love invisible zippers. I guarantee it!
(Oh, before we get started, did you baste the side seams together and do a quick fit check? If not, make sure you do this before inserting the zipper.)
OK, never before seen in print, these are my 1011 best invisible zipper tricks:
- Keep the garment as flat as possible. That means for the Emily Culottes, do not sew up the right side seam yet, and do not sew the left side below the zipper.
- Use an invisible zipper foot specifically manufactured for your machine. Do not waste your money on the generic foot; lots of garments need zippers and this foot is worth every penny. If you do not have one or cannot get one, you can use a regular zipper foot, but you will need to practice to find the EXACT placement of the stitching. Too close to the teeth and the zipper won’t open; too far away and the zipper tape will be visible. Start with your stitching 1/8 from the teeth. Use a basting stitch and practice to find the best placement.
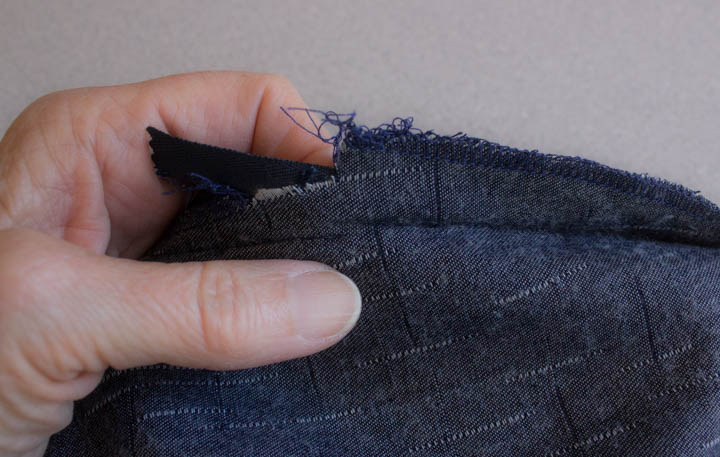
- Interface the stitching line of the seam allowance before inserting the zipper. That super-firm twill tape the zipper is attached to needs to be stitched to a very solid fabric base, or the fabric will ripple over the top of the zipper. Cut strips of fusible interfacing about 3/4 of an inch wide (vertical grain), and fuse to both sides of the left seam allowance of the zipper area. Make sure the interfacing covers the stitching line.
- Clean finish the zipper area seam allowance and the seamline below the zipper area  before you insert the zipper. ( I serged my seam edges) It is too hard to get into this area after the zipper is in place.
- Use a stitch length of 3 or a bit longer. You are going thru several layers, and need the extra stitch length. Especially if you need to rip any of it out! 😉
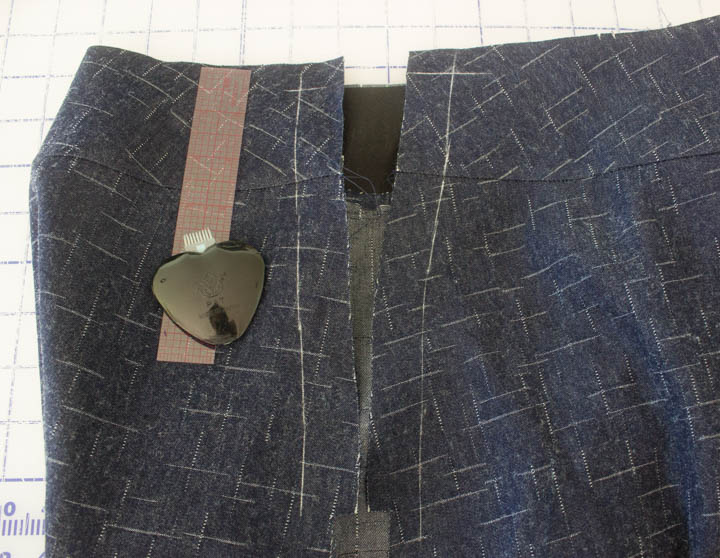
- Mark a chalk line on the right side of the fabric 1/8 + the seam allowance from the raw edge. For your Emily, that means 7/8 of an inch (1/8 + 3/4 = 7/8). Line up the zipper teeth on this chalk line.
- Position the head of the zipper pull at least 1/4″ below the waistband/facing seam allowance, and a bit more is better. This allows for the “turn of cloth” when the yoke lining and seam allowance is turned to the inside after stitching. The thicker your fabric – the more room you will need for the hook and eye. Because every zipper needs a hook and eye at the top, right? Right!
- Make sure the zipper is face down on the right side of the fabric, and stitch one side of the zipper. Doesn’t matter which side; you pick. Life is easy if you are using the invisible zip foot for this stitching, because the foot “rolls” the teeth flat so the stitches go in exactly the correct spot.
- If you can’t figure out how to position the second side of the zipper in place without getting a twist in it; zip it up. Then lay the second “zipper opening” edge on top of the zipper with the seam allowance folded to the wrong side. Flip the whole mess over, unzip the zipper, and align the teeth to the chalk line. You can always zip it up again and look at it from the right side to make sure everything is hunky-dory before you start any stitching.
- Before you stitch the second side of the zipper, change to a basting stitch, and baste only the “horizontal join” areas of the second side. For the Emily, this means the top edge, the yoke/pant seamline, and the bottom edge. The idea is to make sure your stitching is perfectly symmetrical on both sides of these horizontal alignment areas before you stitch the complete zipper in place. If the 2 sides do not line up correctly, it is a bazillion times easier to just rip out a few basting stitches. Keep at it until you are satisfied with how it looks. (I have been known to rip these basting stitches out 4, 5 or even more times if I am using tricky fabric. But it is fast and easy to redo, and worth it in the final product.) Then stitch the second side completely with the same stitch length used on the first side.
- Using a regular zipper foot, sew from the bottom hem of the left side up to where the zipper stitching ends. Ideally, you want to go 1 or 2 stitches beyond the zipper stitching, and very slightly towards the garment. It really helps to chalk this stitching line, at least an inch or two below the zipper. Do not try to perfectly align the seamline stitching and the zipper stitching; they will not align. But you do want them to be as close as possible.
Chalk line marked 7/8 inch from the raw edge of both sides of the zipper opening.
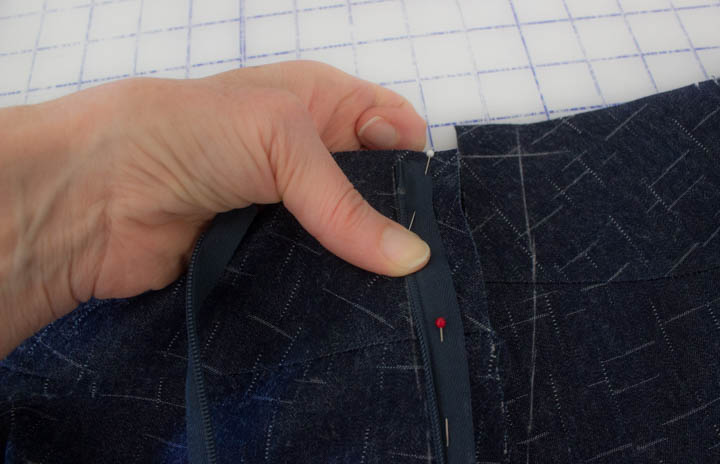
Chalk line marked on upper edge of yoke, accounting for enough space for a hook and eye to be added. The first side of the zipper is pinned to the culottes, right sides together. Notice that the teeth are toward the garment, and the edge of the zipper tape is toward the seam allowance.
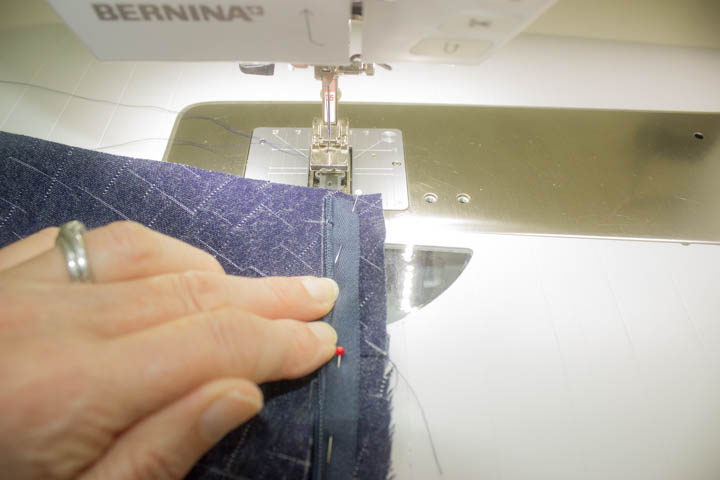
Lining up the zipper teeth in the left side of the invisible zipper foot to stitch.
Checking that the horizontal alignment of the yoke seam is perfect (enough!) with a few basting stitches across this section of the second side of the zipper.
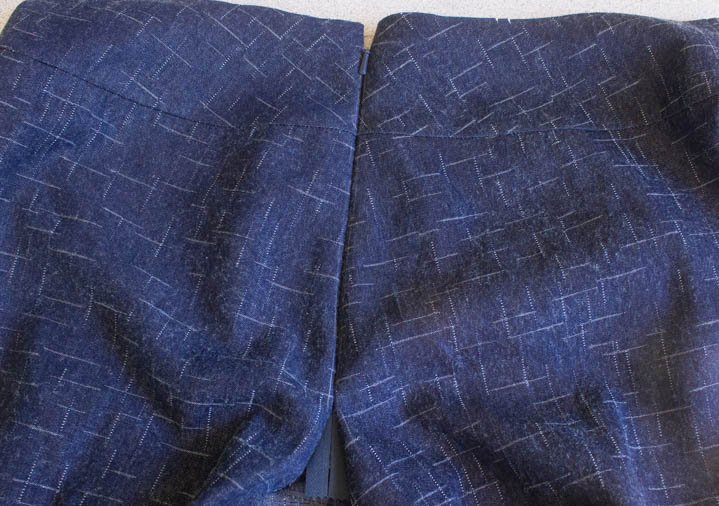
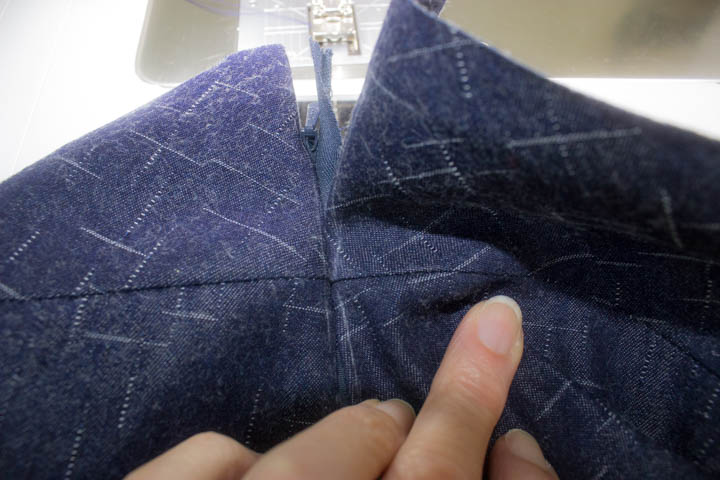
Both sides of the zipper are stitched, and the top, bottom, and yoke seamline all align correctly. Yay!
See how the left side seam stitching is very slightly “below” (from the perspective in this image) the zipper stitching? And the side seam stitching only extends about 1 stitch beyond where the zipper stitching stops.
Bam! Press the zipper over a ham, and nary a bulge, pucker, or ripple to be seen. You’re welcome!
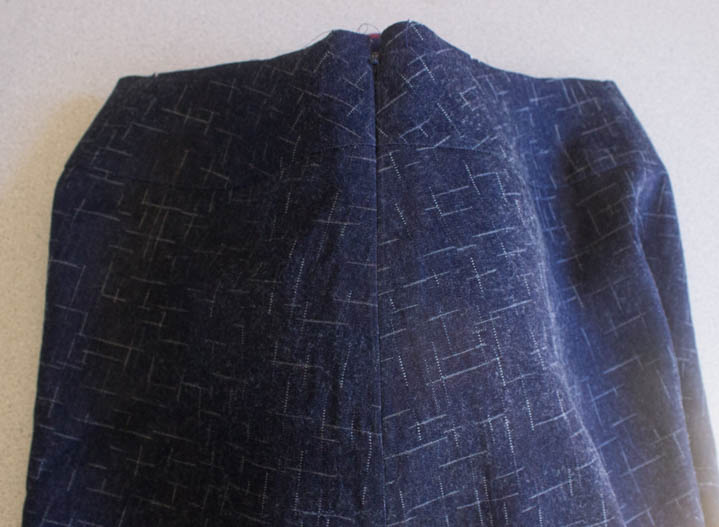
Stitch up the right side of your culottes, finish the edges, and press both the left and right side seam allowances open. Easy peasy, right?
Can you believe you only have to add the yoke lining and hem the culottes? This version is such a quick sew; I love it!
Happy sewing!
Maris